User Offboarding Automation in Salesforce
.svg)
Table of Contents
Simplifying Offboarding with User360 Templates
User360 provides predefined templates to automate and streamline the offboarding process. By allowing administrators to create customizable offboarding workflows, User360 helps ensure tasks such as user deactivation, permission revocation, and record transfer are handled accurately and consistently. This automation reduces manual work and lowers the risk of human error in the offboarding process.
Offboarding with User360 Templates: A Step-by-Step Guide
Scenario: Company XYZ is offboarding three employees—Emma, James, and Lisa—who manage critical accounts and serve as approvers for the custom object ‘Approval History’.
Objective: To ensure a smooth offboarding process, we will deactivate their user accounts, remove permissions, transfer record ownership, update the ‘Requested By’ field for pending approvals, and record their deactivation dates in Salesforce.
Step-by-Step guide
1. Navigate to “Configurations”: Access the “Configurations” tab for user actions in User360.
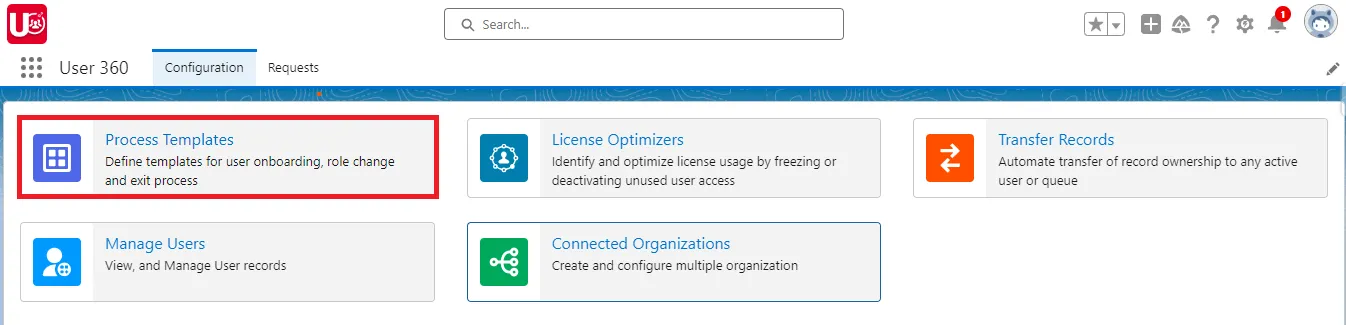
- Create Process Templates: Within “Configurations,” select “Process Templates” and click “New” to initiate a template.
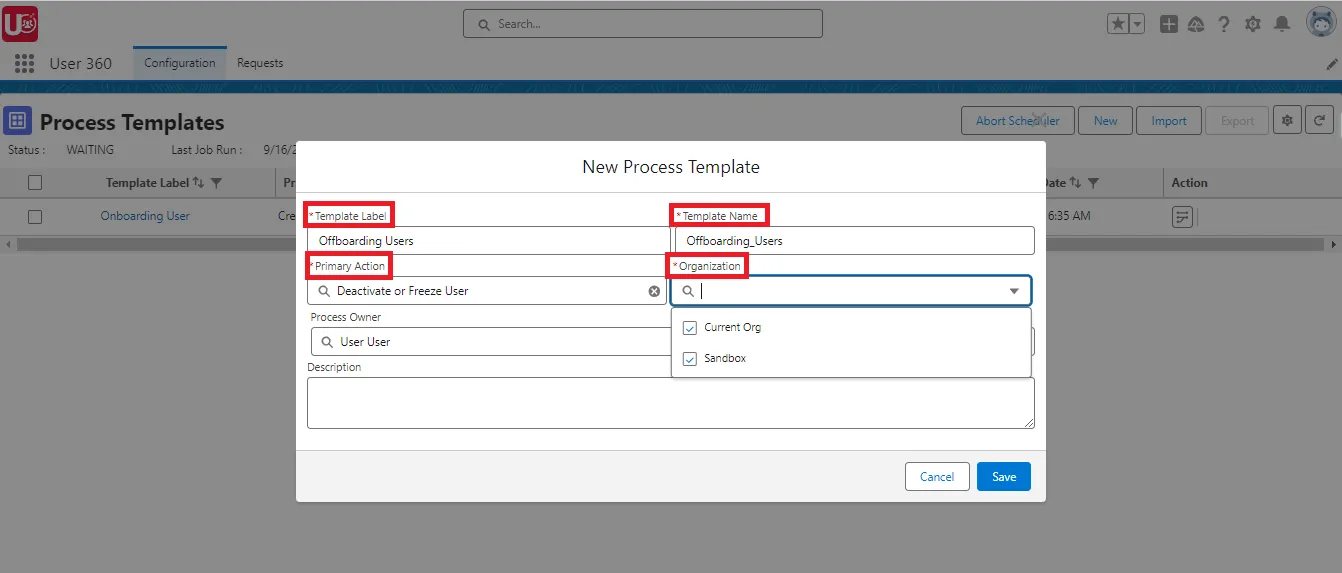
- Define the Primary Action: Set the primary action to “Deactivate User” to specify the template’s function.
- Assign a Template Label: Enter “Offboarding Users” as the template label. The template name will be auto populated.
- Select the Organization: Select “Current Org” and “Sandbox”. To create requests for both orgs, you will have to create separate requests for each org.
Note: Sandbox organization will be available only after Multi-Org setup is complete. For more details, refer to the link. - Set the Process Owner: The process owner field is automatically populated with the login user’s name, but it can be edited if needed.
- Enter a Description: Provide a brief description of the template’s purpose to assist other administrators or users who may interact with it.
- Save the Template: Click “Save” to finalize the template creation.
After Template Creation
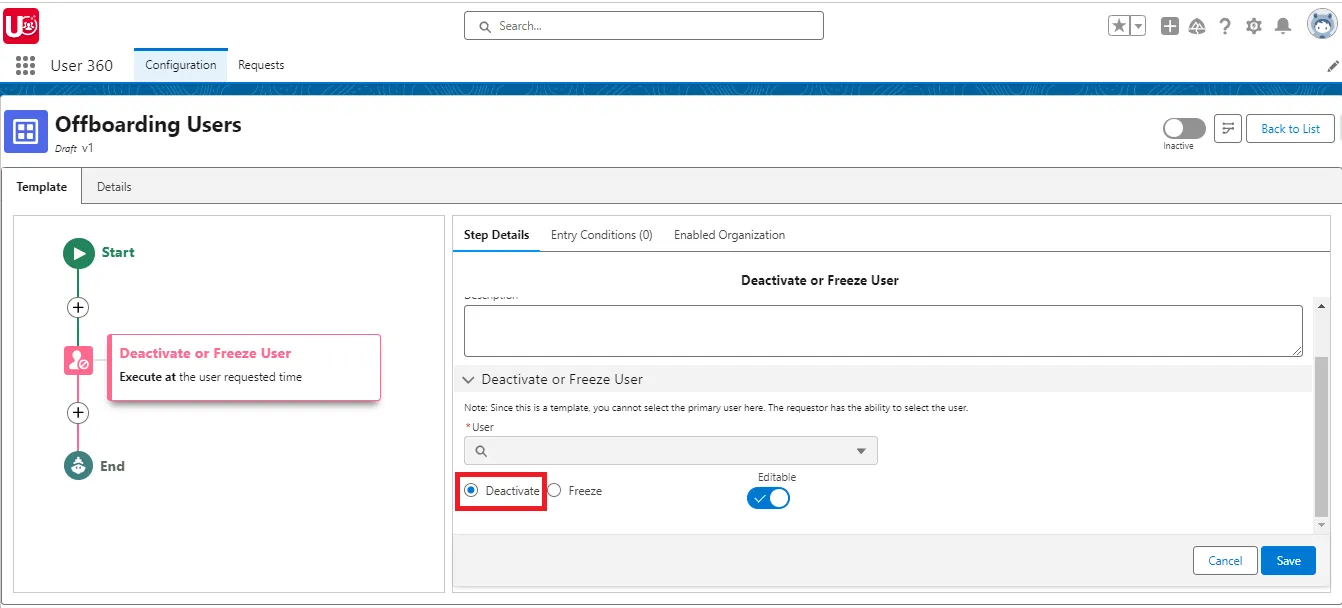
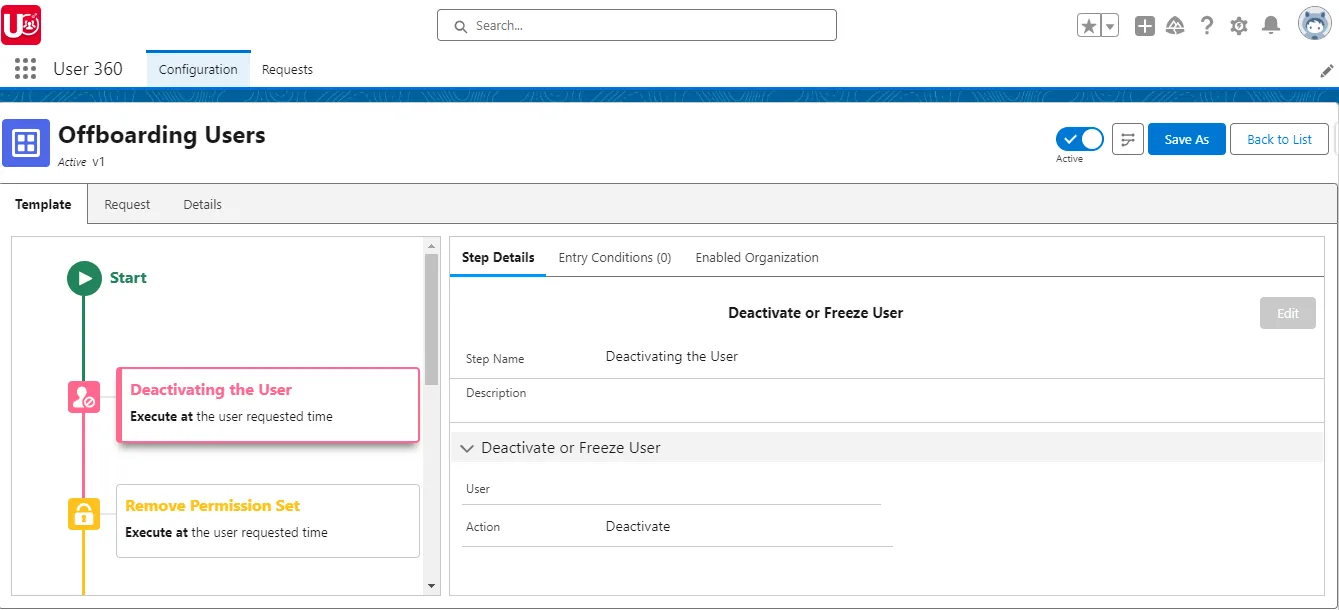
- Provide Template Details: Deactivate or Freeze User: Choose the action type as “Deactivate.”
NOTE: Depending on your company’s policies or requirements, you can opt to keep the “Action” field editable and then save the step.
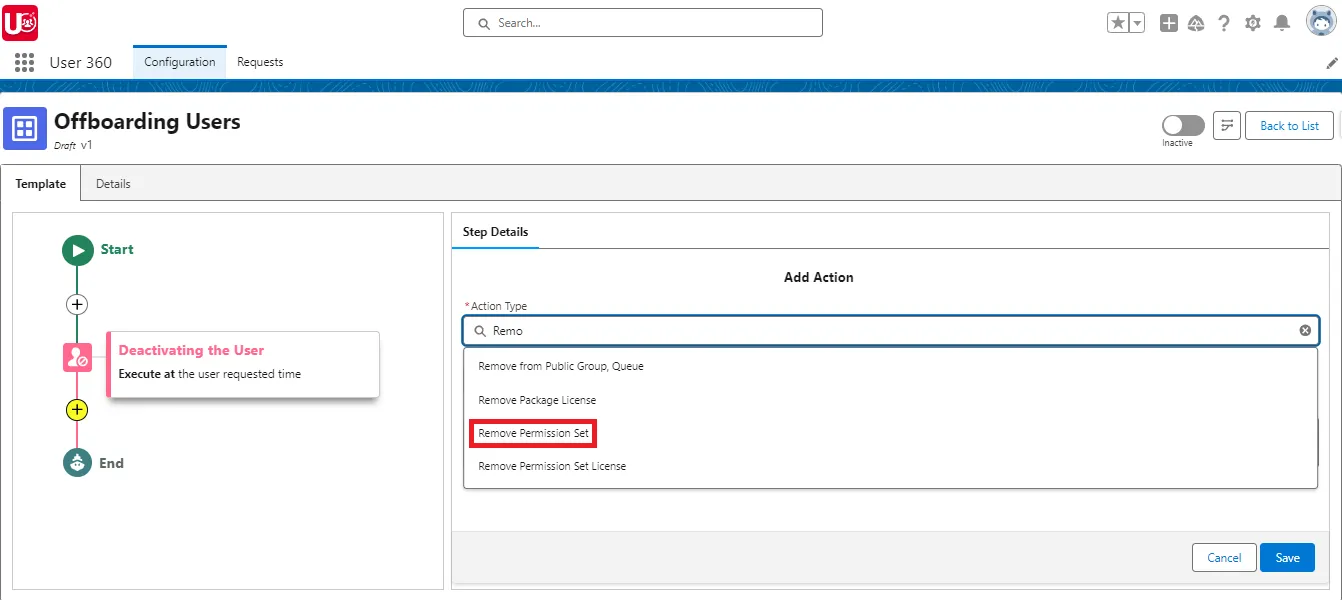
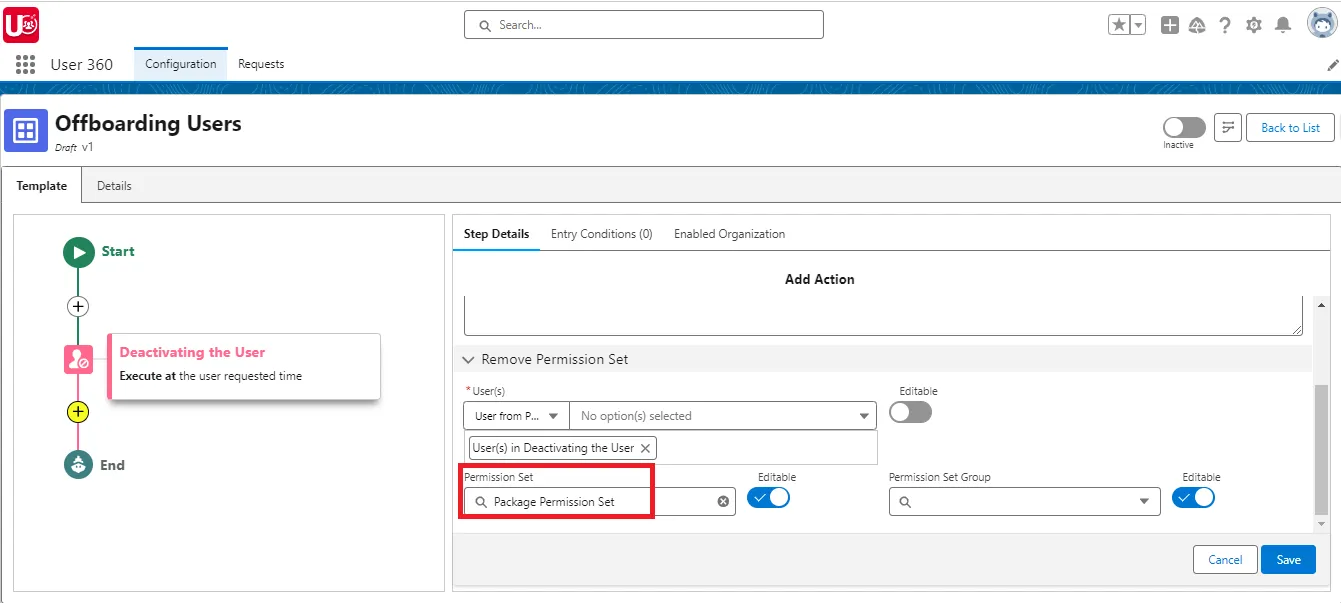
- Remove Permission Sets: Select “Package Permission Set” in the “Permission Set” field. By default, “Users from Process Step(s)” is selected
NOTE: You can choose specific Permission Sets/Groups to remove or leave the field editable for future modifications.
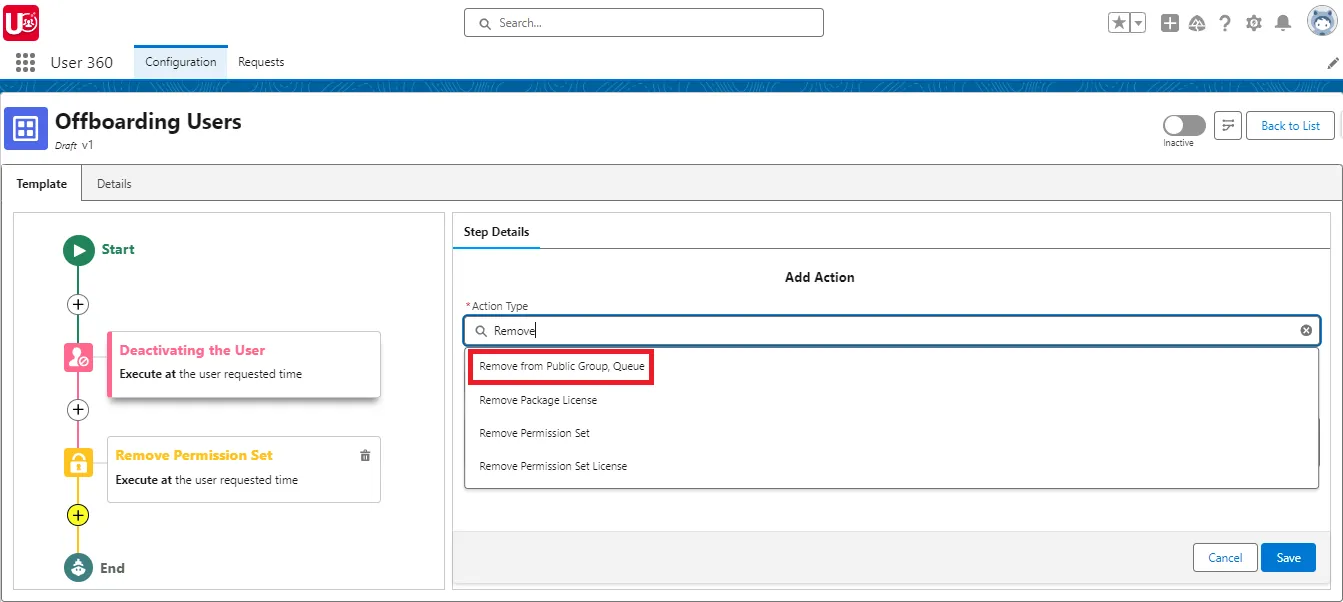
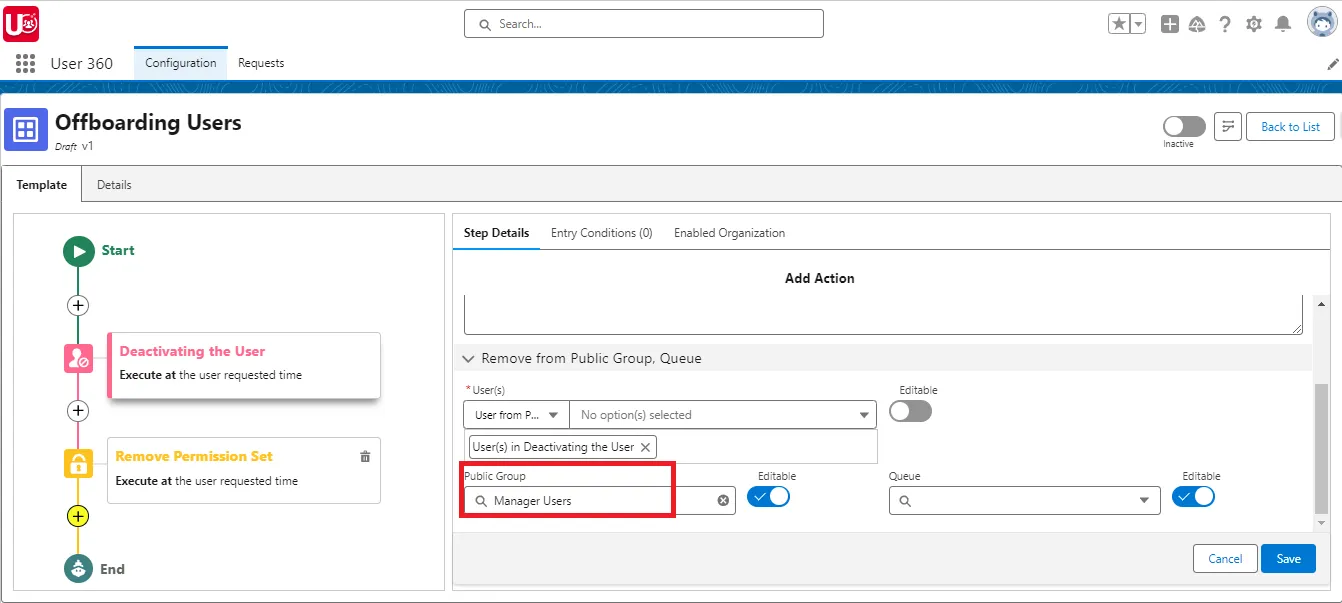
- Remove from Public Group/Queue: Add another step specifying details for removing users from “Manager group”.
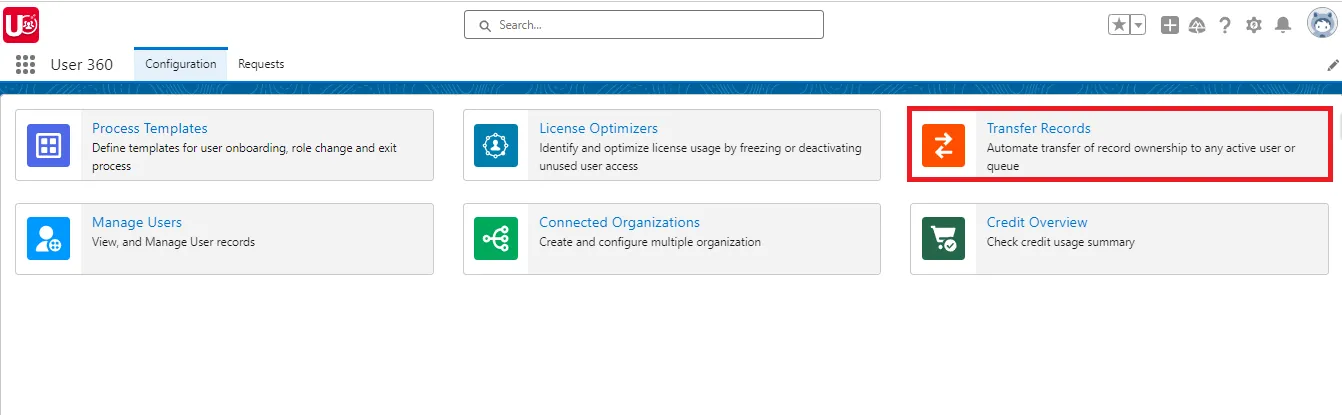
- Transfer Records:
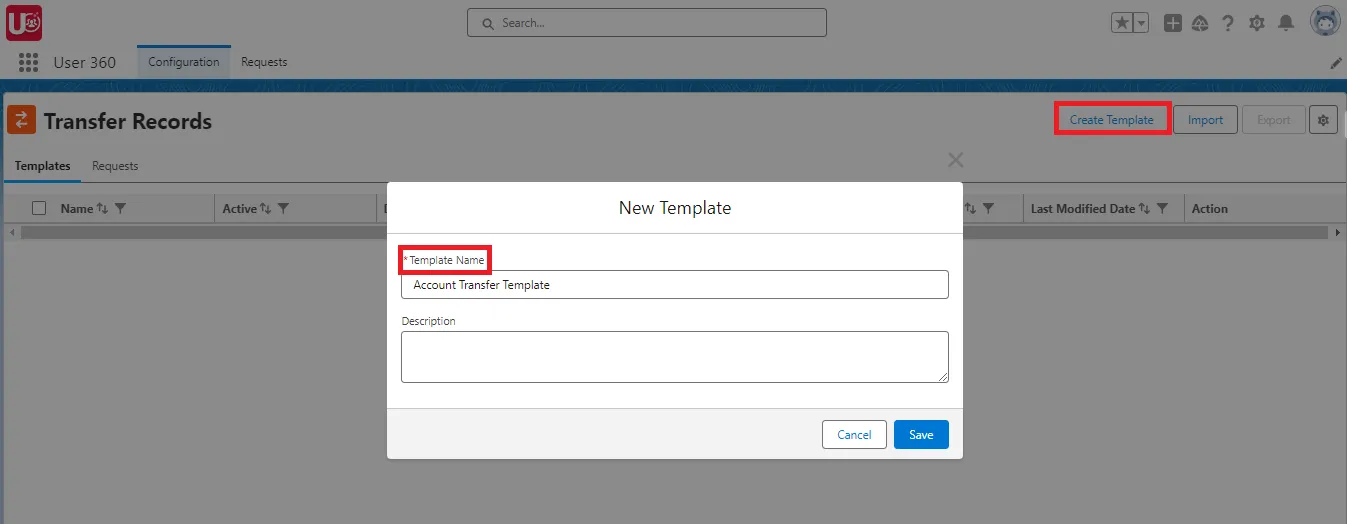
- Navigate to the “Configurations” tab and select “Transfer Records”.
- Click “New,” enter the label “Account Transfer Template,” and click “Save.” (Slide 2)
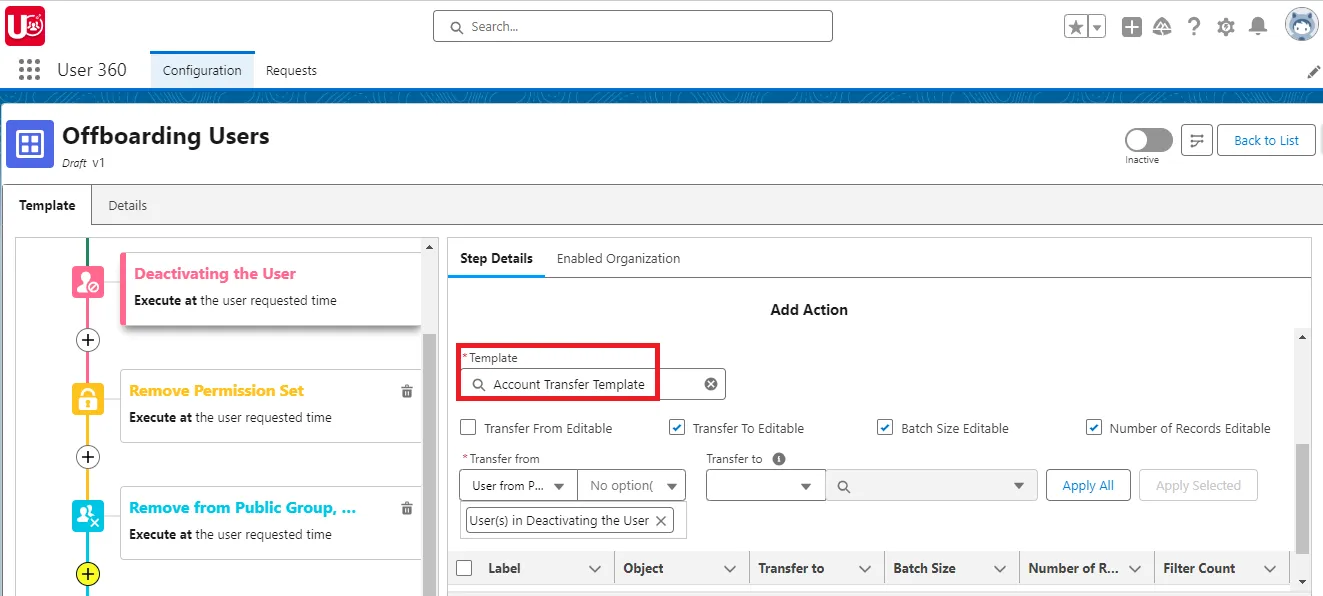
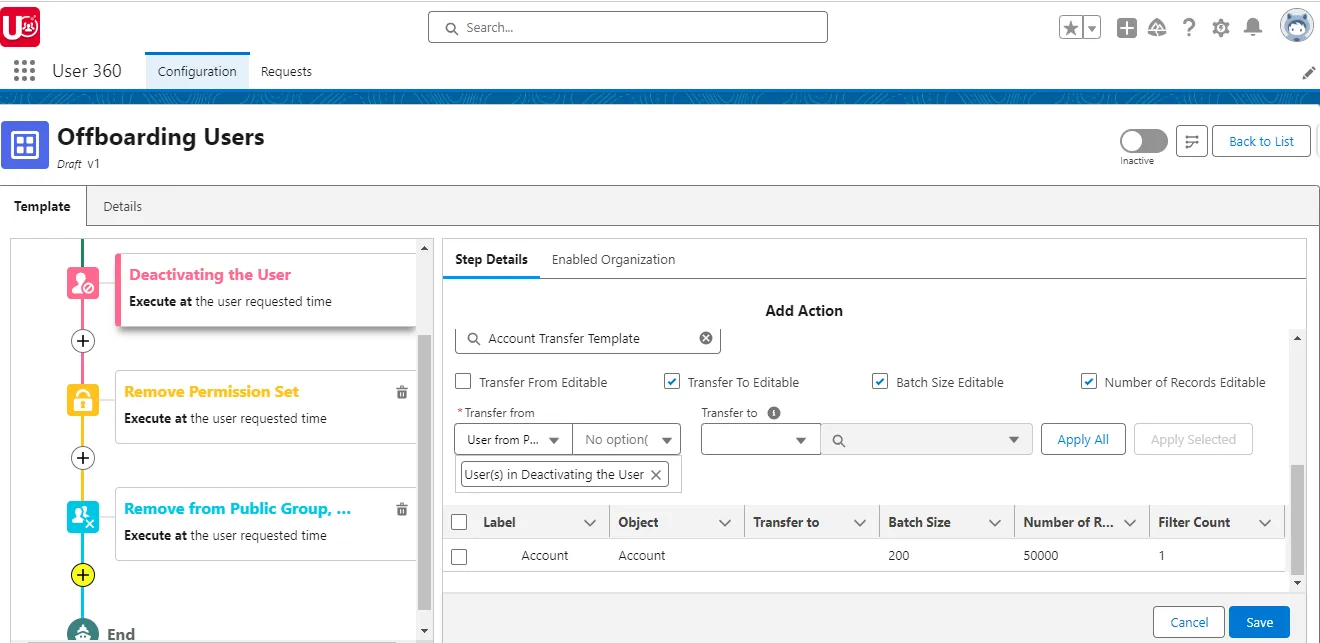
- Set the Object to “Account,” specify the Batch Size as 200, add the filter “Industry equals Retail,” and click “Save.” (Slide 3&4)
- Activate the template. (Slide 5)
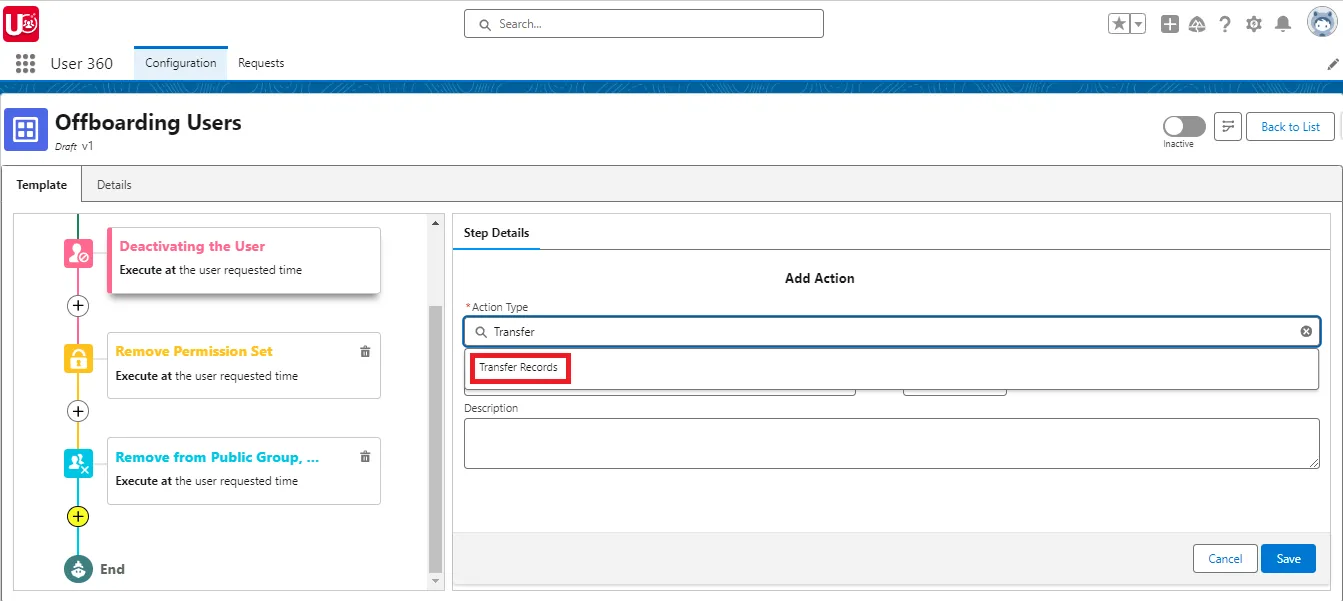
- Go to the Process Template, select “Offboarding Users,” and add the next action as “Transfer Record.”
- Choose the “Account Transfer Template” in the template field. (Slide 2)
- Setup filtres for the action as required and click “Save.” (Slide 3)
For more details about the Transfer Record templates, please refer to this link.
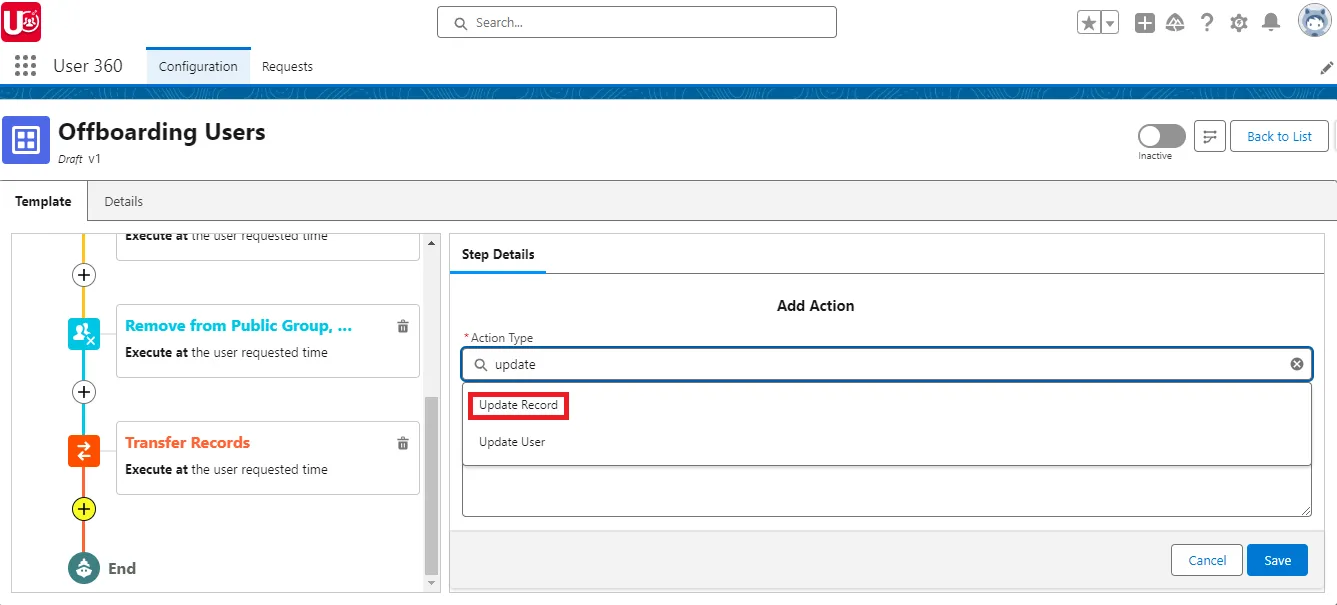
- Update Records: Select “Update Record” as the next action, choose “Approval History (Custom Object)” as the object, and add the ‘Requested By’ field. Add a rule as “Status equals Requested.”

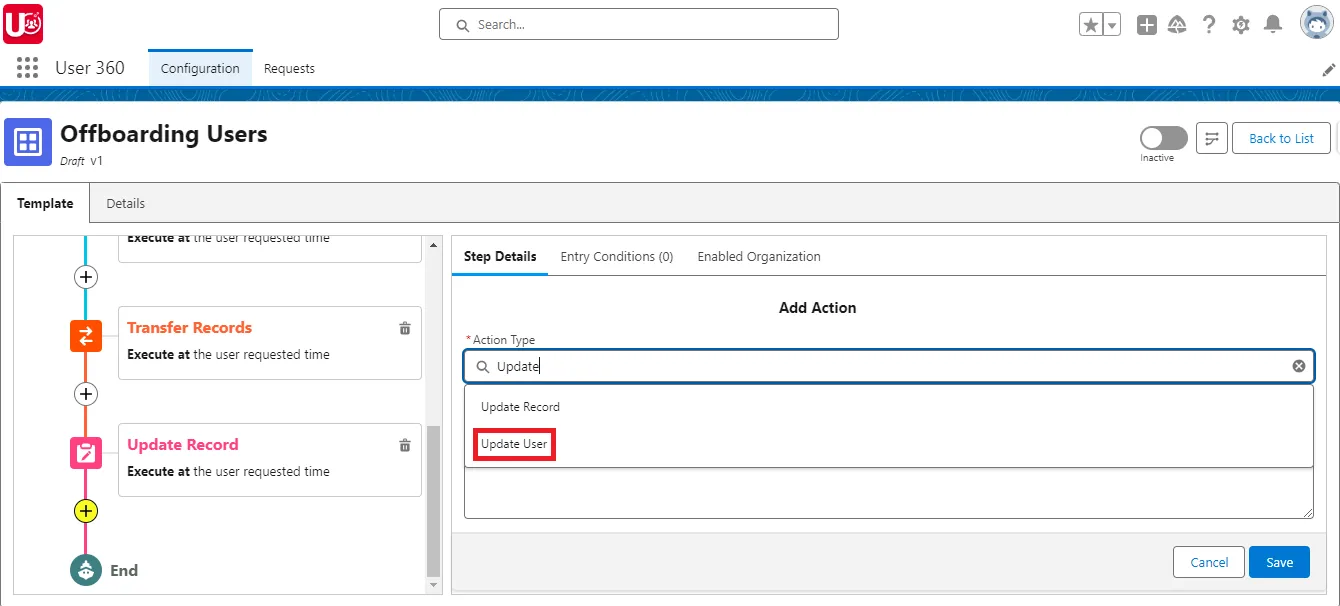
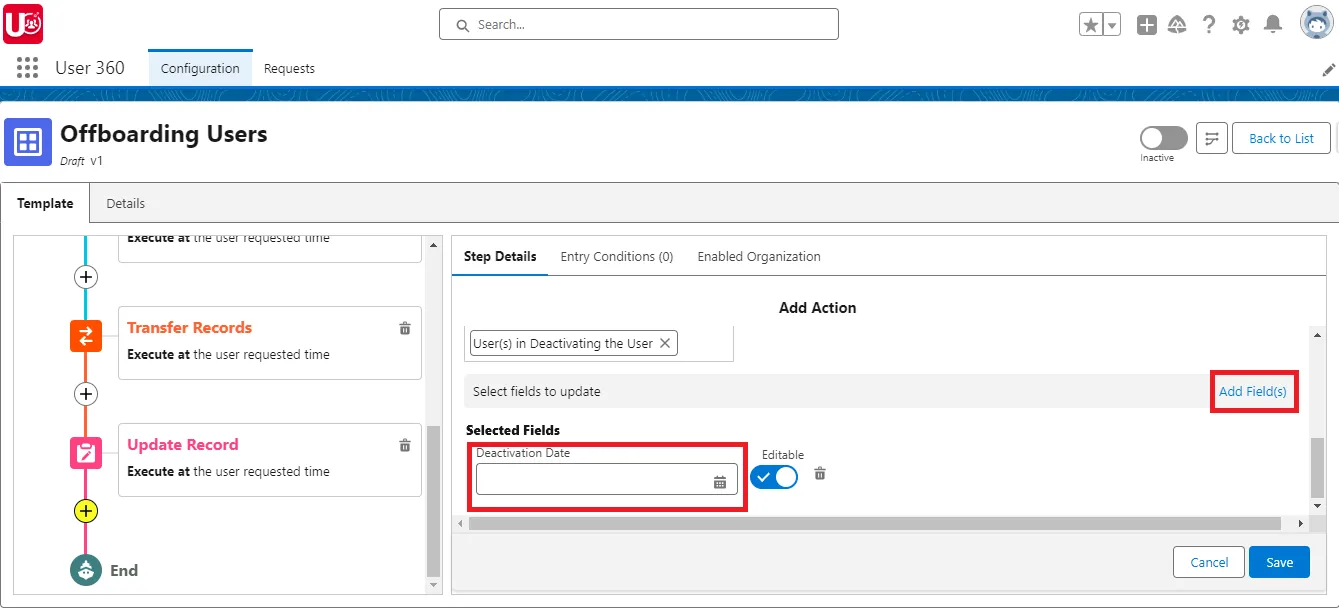
- Update User: To update the deactivation date on the User object, select “Update User” as the next action and add the “Deactivate User” field.
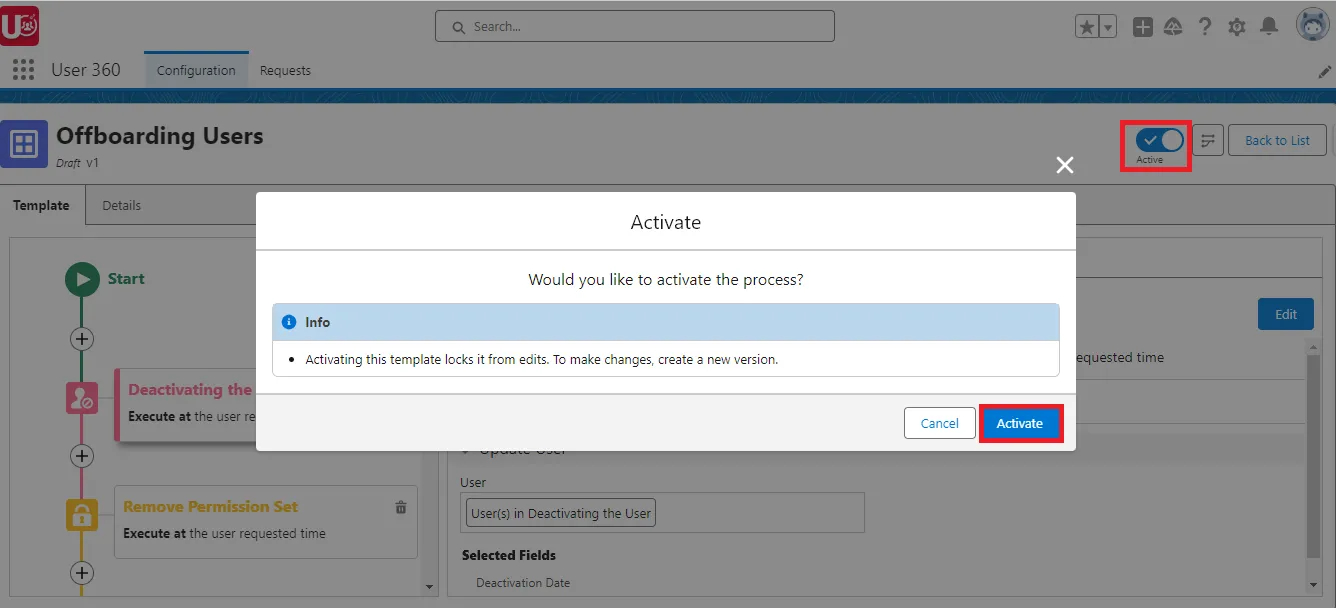
- Activate template: Before activation, review and validate the template for accuracy. Finalize by activating the template for practical use.
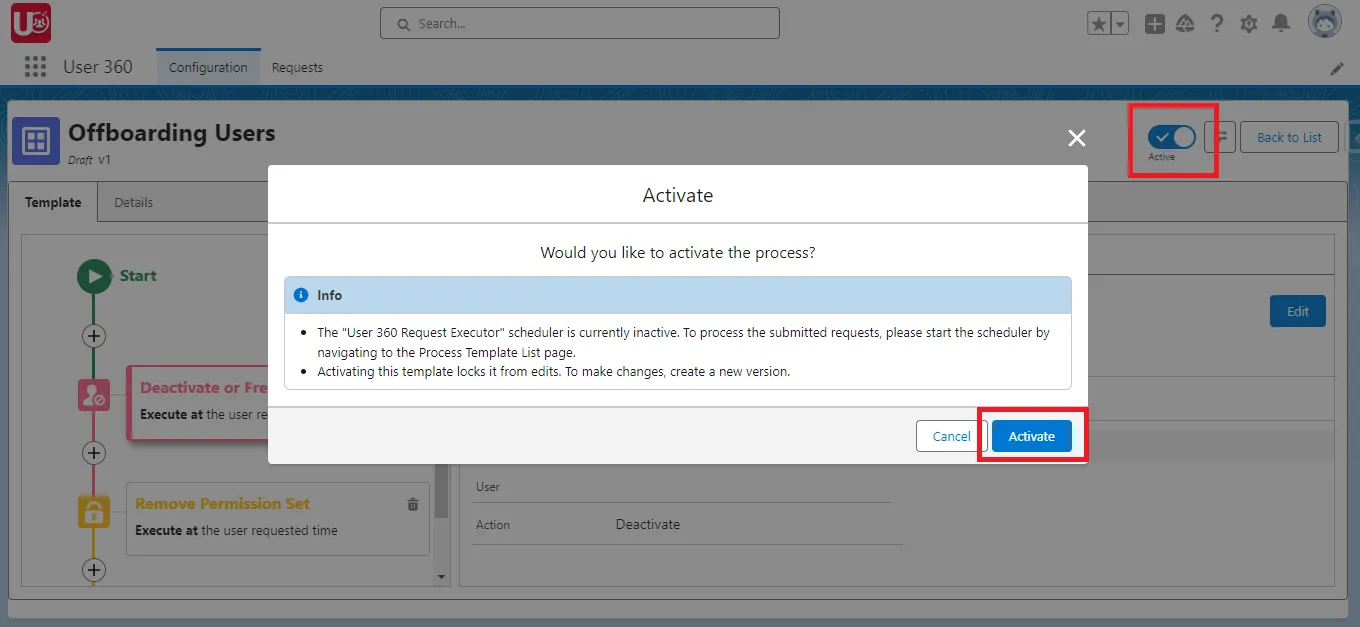
NOTE: Once the template is activated, its fields cannot be edited. To make changes, you’ll need to create a new version of the template. For further details, please refer to the link.
Conclusion:
Offboarding with User360 not only saves time but also ensures accuracy and data security, thanks to its powerful automation templates. With Part 1 covering the offboarding process, you’re now equipped to manage this crucial task efficiently. In Part 2, we’ll dive into user creation automation, exploring how User360 can further enhance user lifecycle management in Salesforce. Be sure to continue reading to unlock more ways to streamline your admin processes.
Ready to Transform with AI?
More Insights for you