Creating Transfer Records Templates with User 360
.svg)
Table of Contents
Introduction
Transferring records in Salesforce, especially with multiple users and objects, can be complex and time-consuming. Ensuring accurate and seamless data movement without manual intervention is critical for maintaining business continuity.
With User 360, administrators can simplify this process using Transfer Records Templates, which automate record transfers across users and related records. These templates significantly reduce manual effort and errors while improving data accuracy and consistency.
In this blog, we’ll explore the steps to create Transfer Records Templates, helping your organization automate record transfers efficiently.
Use Case
Imagine your Sales Operations Manager, who handles hundreds of Accounts, is moving to a new department. To ensure business continuity, all their Accounts, Opportunities, and Cases need to be reassigned to a new manager quickly and without errors.
Manually performing these transfers would be tedious and error-prone, but with User 360 Transfer Templates, the entire process can be automated:
- Use the pre-configured transfer template for efficient record reassignments.
- Dynamically assign the new manager as the recipient to transfer ownership.
- Initiate the batch processing to move all records while preserving their relationships (e.g., Contacts and Opportunities linked to Accounts).
Once completed, the new manager will have immediate access to all the transferred records, with no data loss or manual errors.
Steps to Create Transfer Records Templates
1. Access the Configurations Tab: Start by navigating to the User 360 app and selecting the Configurations tab. Here, you’ll manage all templates related to user management processes, including record transfers.
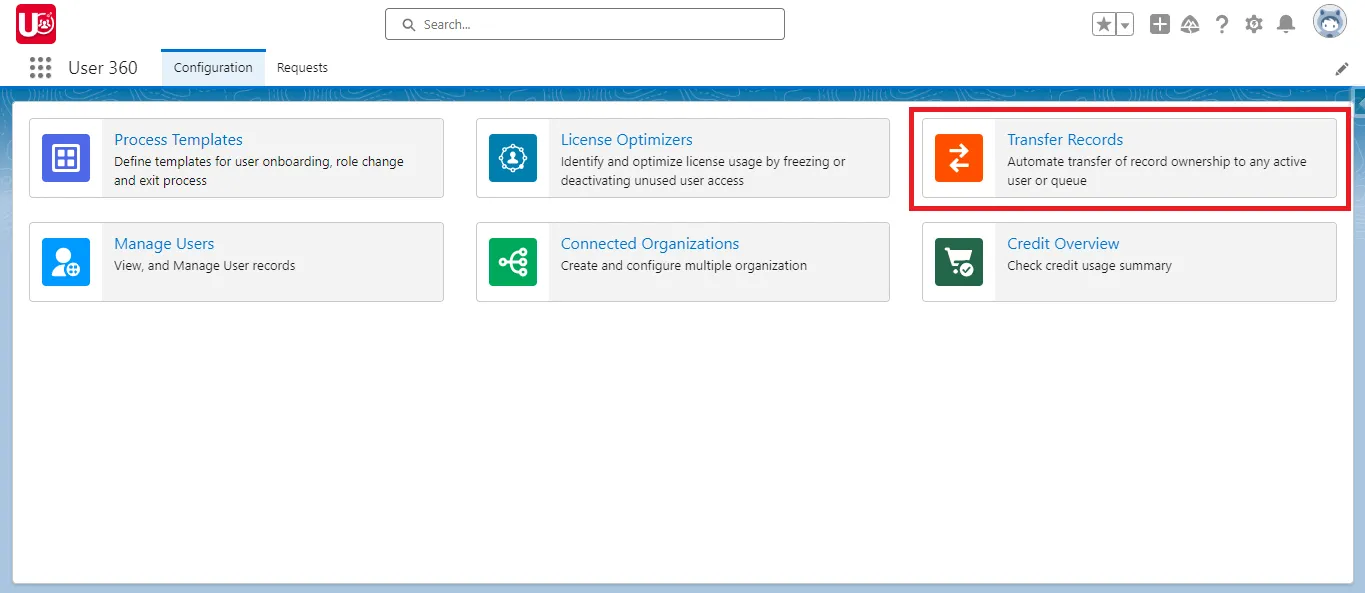
2. Create a Transfer Records Template:
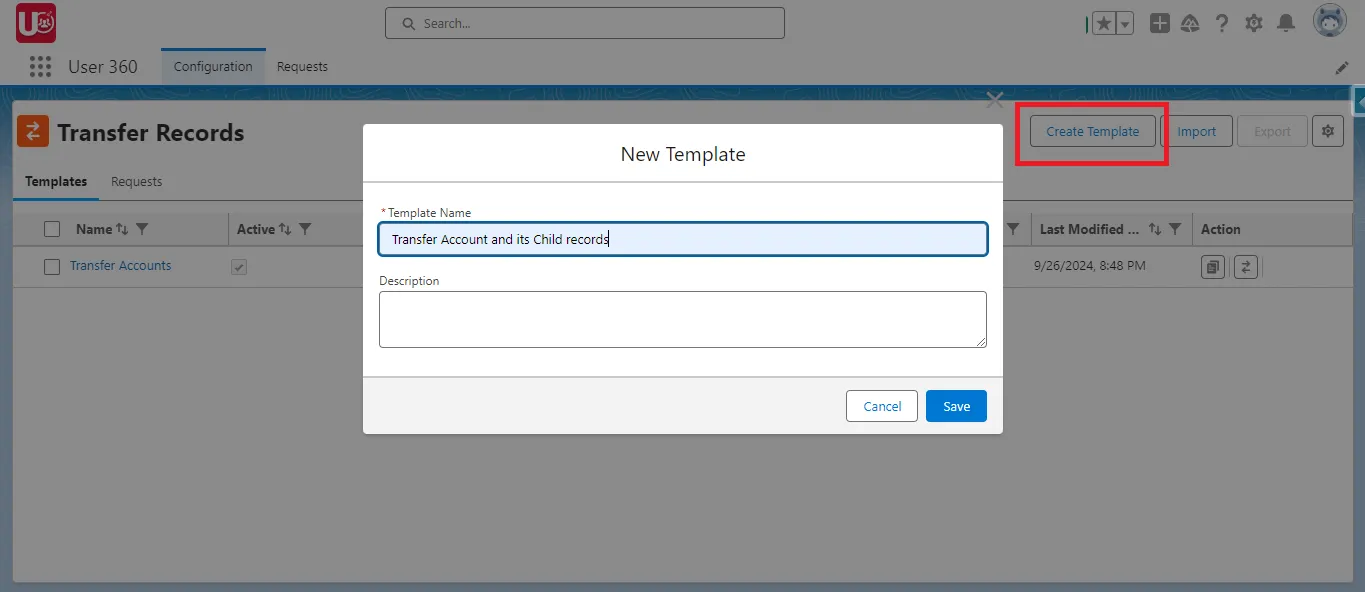
- Select Transfer Records and click on the Create Template button.
- Give your template a name (e.g., “Salesforce Record Transfer”) and, optionally, a description to detail its purpose (e.g., “Transfers records from departing users to new users”).
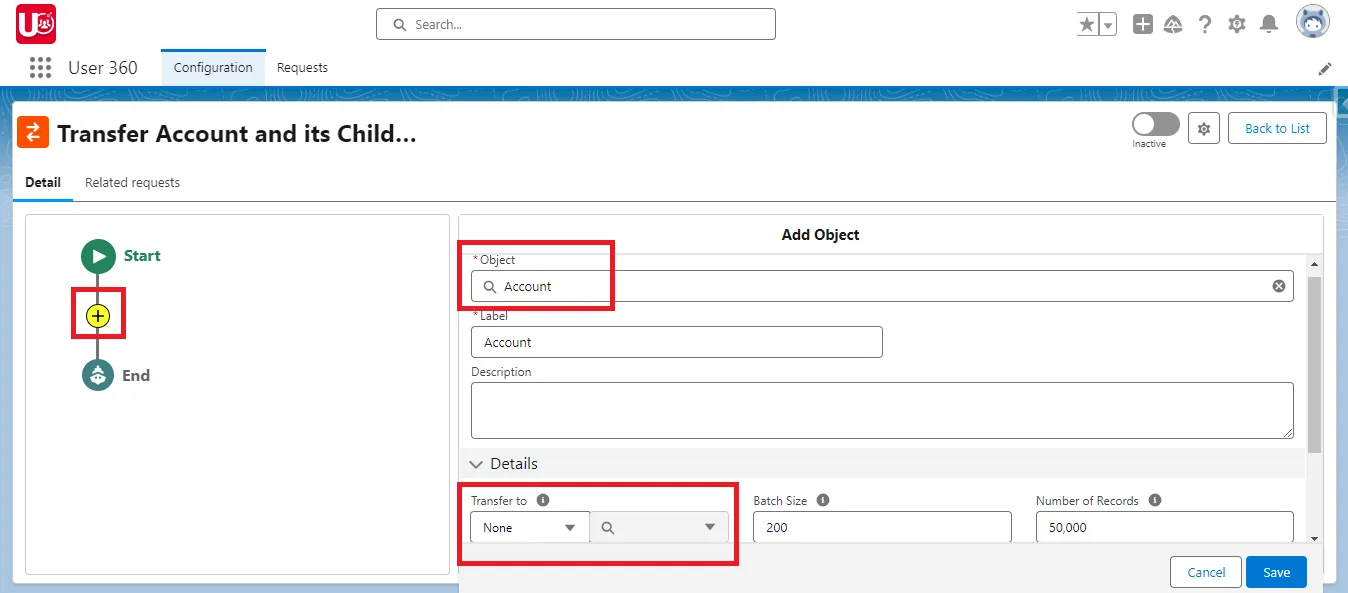
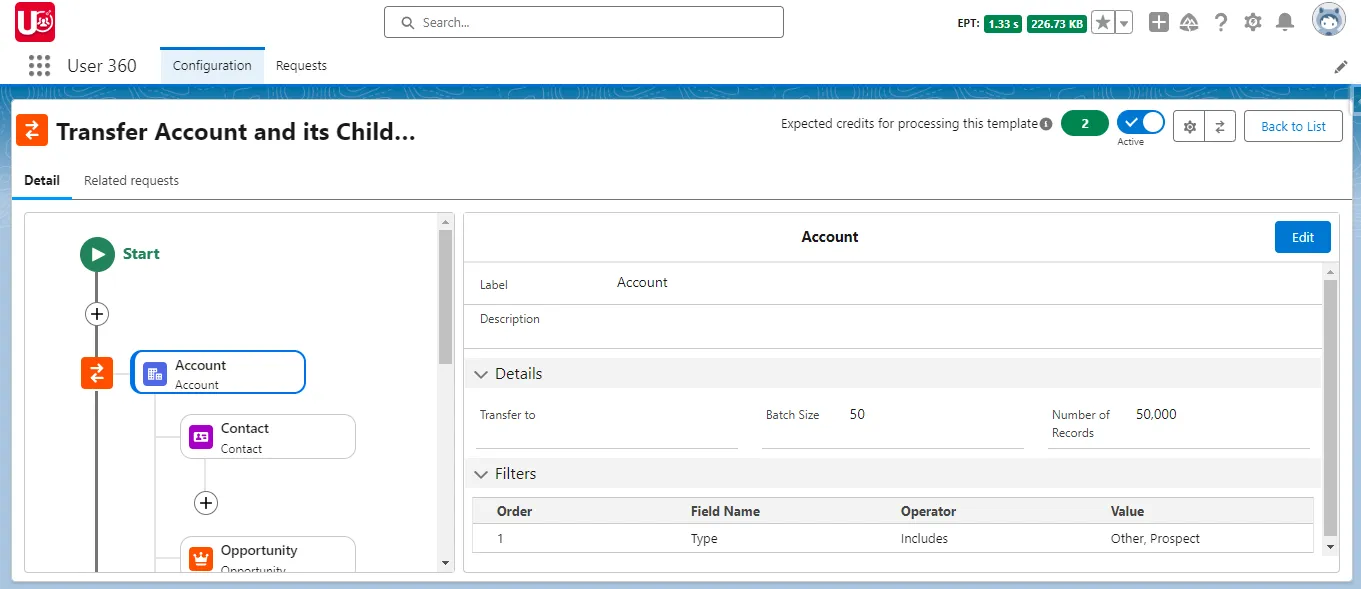
3. Set the Transfer Objects:
- In the Details tab, click the + icon on the visual flow to add the first object to be transferred, such as Accounts.
- Set the Transfer To field dynamically. This ensures that the destination user can be updated when the template is reused for different processes, without hard-coding the recipient.
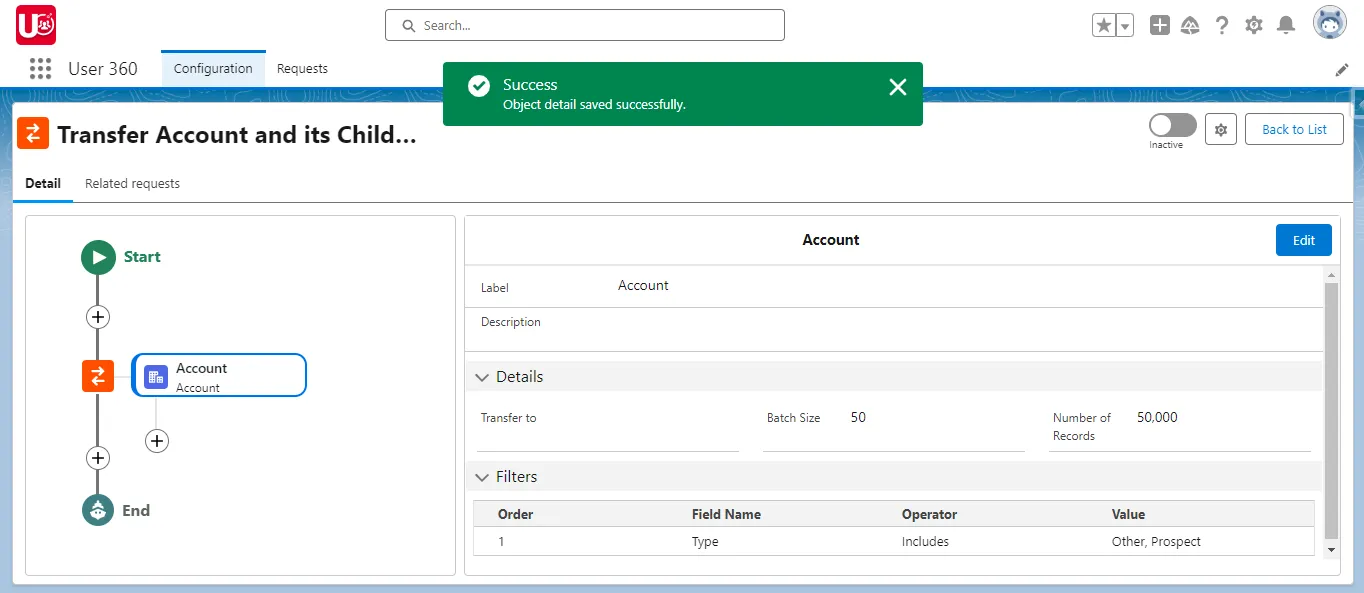
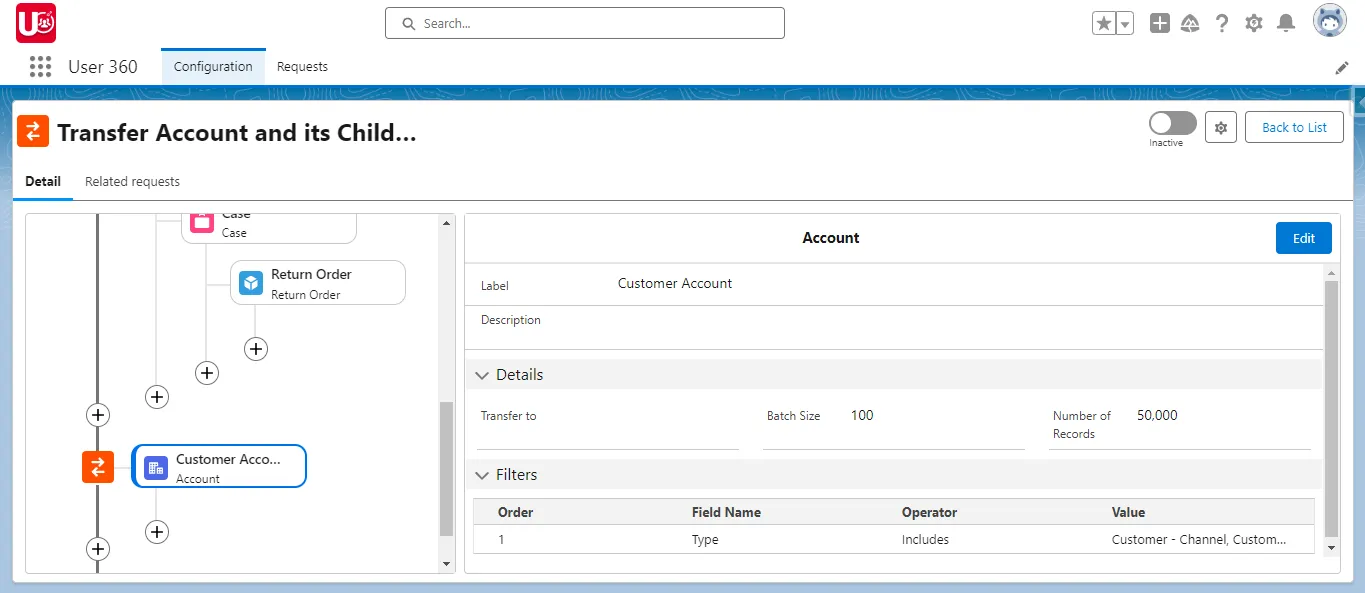
4. Define Batch Size and Record Count:
- Specify the Batch Size for each transfer. For example, set it to 50 records at a time to prevent overwhelming system resources.
- Set the total Number of Records to be transferred (e.g., 500 records). If not properly configured, only the first set number of records will be transferred, leaving the rest behind. Leaving it blank would automatically indicate transferring all records.
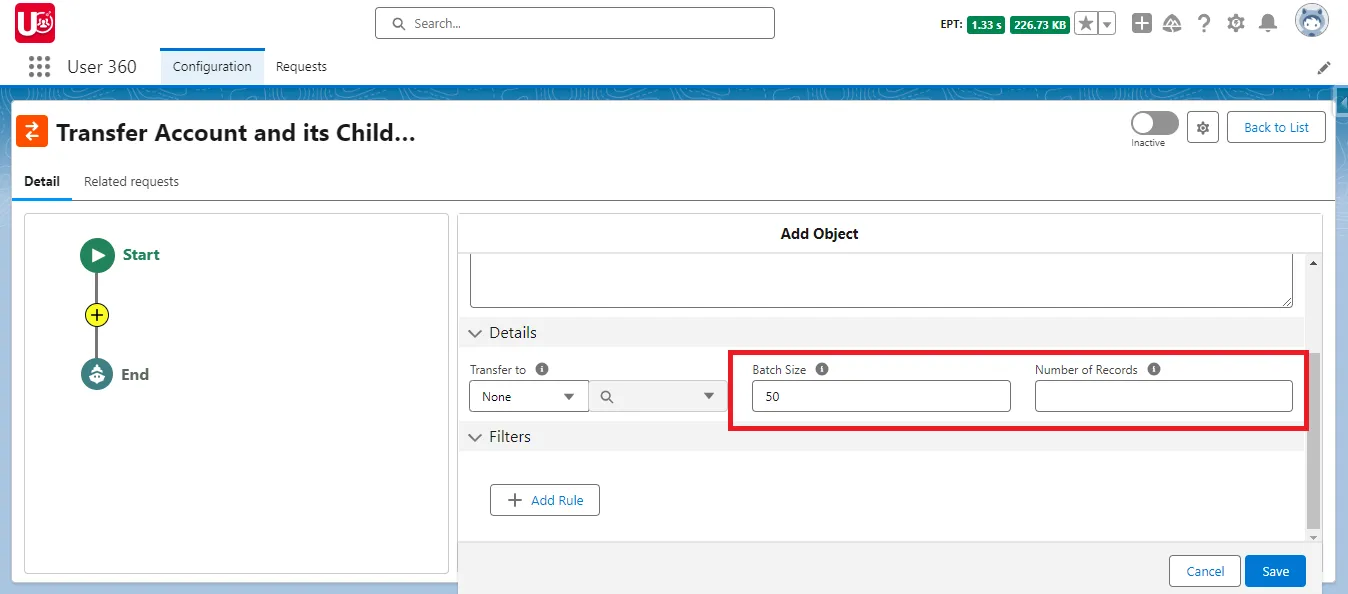
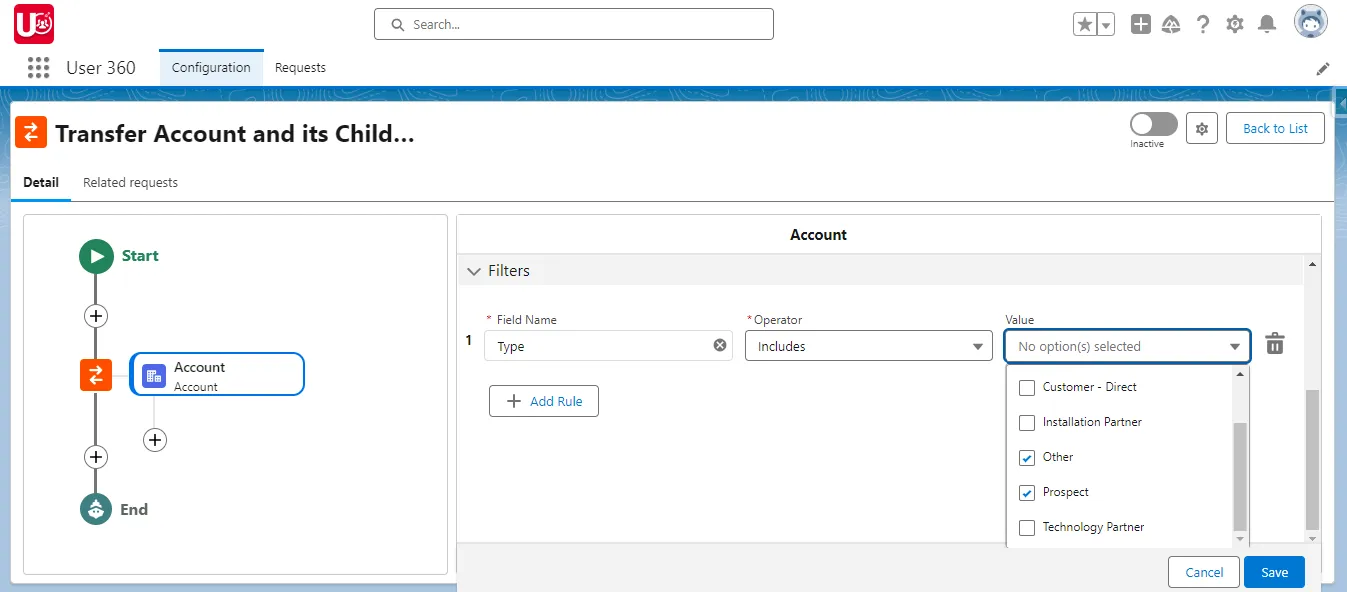
5. Apply Filters: Add filters for the selected object. For example, when transferring Accounts, you might want to only transfer those marked as Person or Small Business or Other accounts. This ensures that unnecessary records are not transferred.
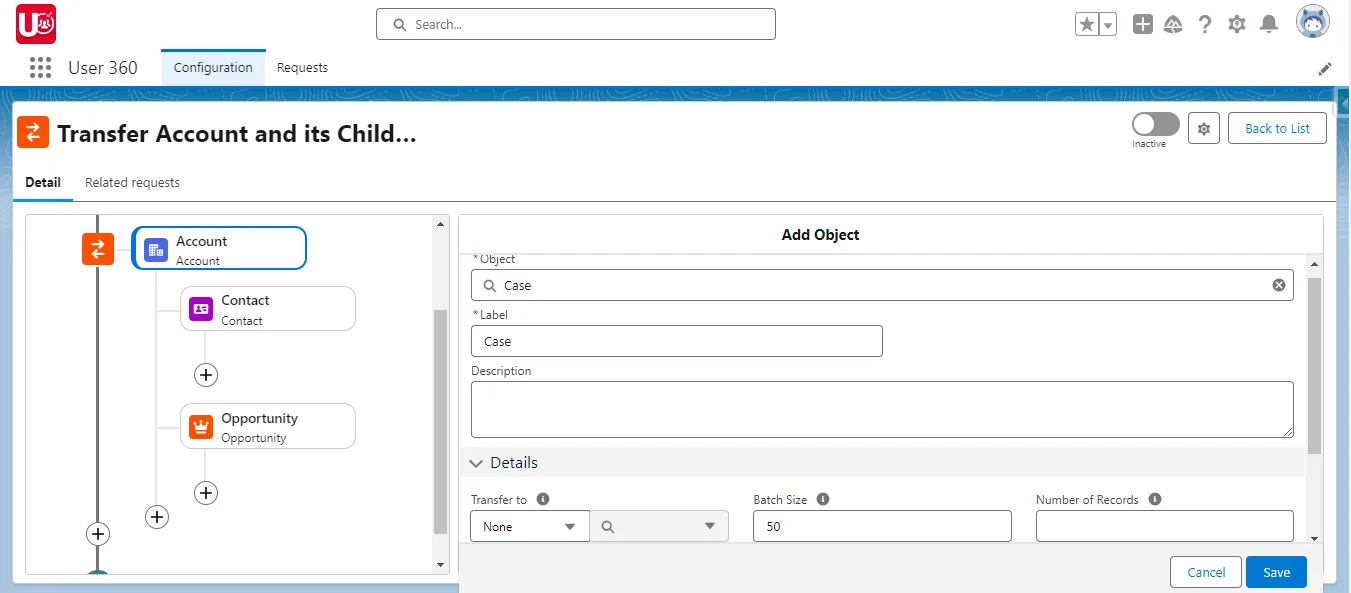
6. Add Related Records:
- Click the + icon again to include related objects such as Contacts, Opportunities, and Cases.
- For Contacts, transfer all related records under the Accounts object without any filters. Set the Batch Size to 50 records and leave the Transfer To field blank to ensure they are automatically transferred with the accounts.
- For Opportunities, adjust the Batch Size to 25 for more manageable processing. Similarly, transfer all related Cases using the same methodology as Contacts.
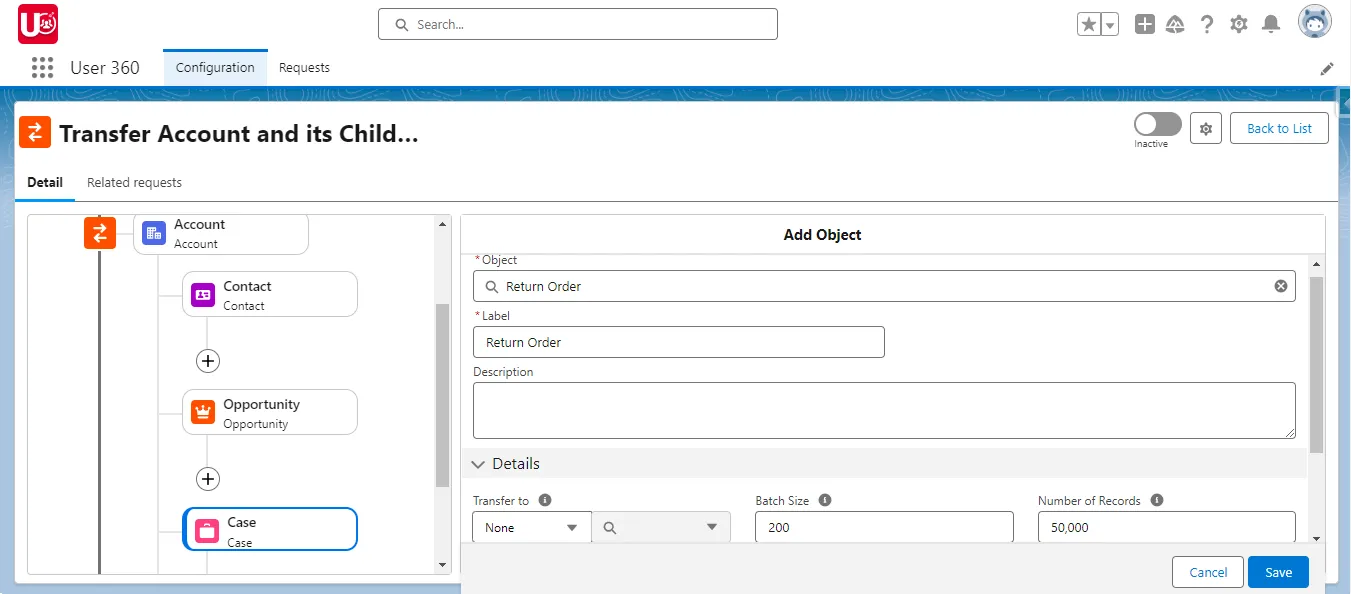
7. Include Grandchild Records: For deeper record hierarchy, such as transferring Opportunity Products related to Opportunities or Return Order related to Cases, set up grandchild objects. This ensures that not only parent records but also any sub-related records are transferred seamlessly.
8.Configure Additional Transfer Options:
- Define whether remaining records, if any, need to be transferred to different users. You can add multiple recipient criteria and further configure batch sizes or apply specific filters.
- Repeat this process for all necessary child or grandchild objects to ensure comprehensive record transfer coverage.
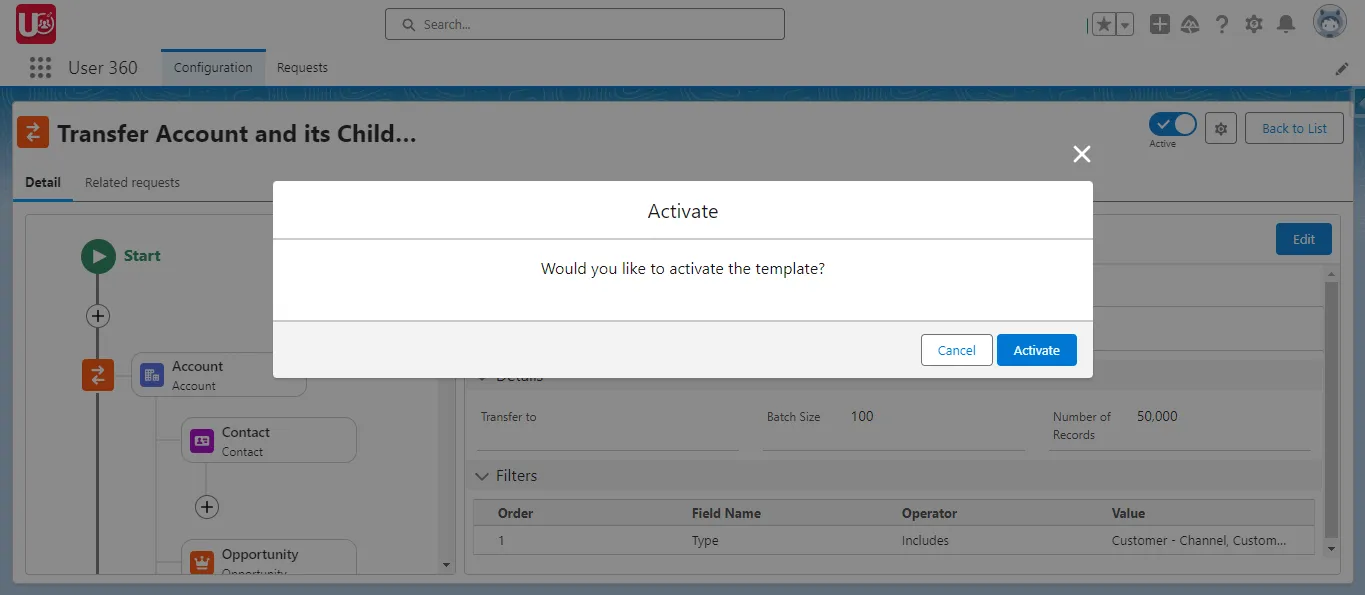
9. Save and Finalize the Template: Once all the necessary details and objects are set up, click Save to finalize the template. This template can now be used repeatedly in various processes, saving significant time on future record transfers.
Use Case Extended:
Imagine your Sales Operations Manager is moving to a new department, requiring their Accounts, Opportunities, and Cases to be reassigned to a new manager quickly and accurately.
Manually handling these transfers could lead to errors or delays, but with User 360 Transfer Templates, the entire process is automated:
- Use the pre-configured transfer template.
- Dynamically define the new recipient to transfer ownership of all related records.
- Batch process the transfers, ensuring all records stay correctly linked.
By the end, the new manager will have access to all appropriate records, with no data loss and minimal manual intervention.
Conclusion:
By creating Transfer Records Templates in User 360, Salesforce administrators can automate complex record transfers, saving time and reducing errors. These templates ensure smooth, accurate data handovers, maintaining data continuity and improving user management efficiency.
Now that you’ve mastered setting up templates, you’re ready to further optimize your Salesforce operations. In the next blog, we’ll cover how to execute these templates and explore the benefits of real-time triggers for even more seamless automation.
- Previous Blog in Series: Introducing User360
- Next Blog in Series: Executing Transfer Templates
Stay tuned as we continue to show how User 360 can elevate your Salesforce user management workflows.
Ready to Transform with AI?
More Insights for you