Step-by-Step Guide to Transfer Record in Salesforce with User 360
.svg)
Table of Contents
Introduction
In our previous blogs, we discussed how User 360 helps create powerful Transfer Records Templates to automate complex record management tasks. But once those templates are set, how do you put them into action?
This blog focuses on how to execute salesforce mass transfer records immediately using the templates you’ve created, allowing you to manage large volumes of Salesforce records efficiently. Whether you’re handling employee transitions or reorganizing data ownership, immediate execution ensures you transfer the right records to the right users, without delay.
Transfer Records Salesforce - Initiate Immediate Record Transfers in User 360
Executing Salesforce Record transfers immediately allows you to respond to urgent changes or unexpected needs without manual intervention. Here's a detailed guide on how to use User 360 to transfer records salesforce quickly and accurately.
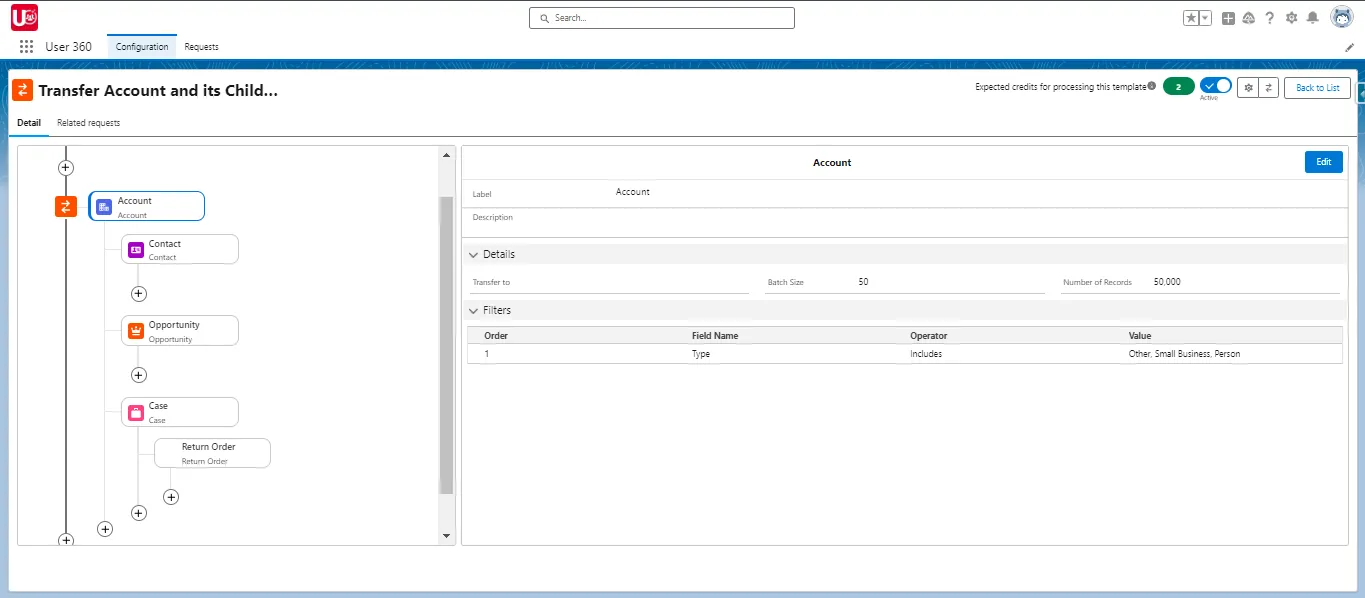
1. Locate the Transfer Template
Start by opening the Transfer Records Template that you configured earlier. This template already has the objects, filters, and transfer rules you set up in place.
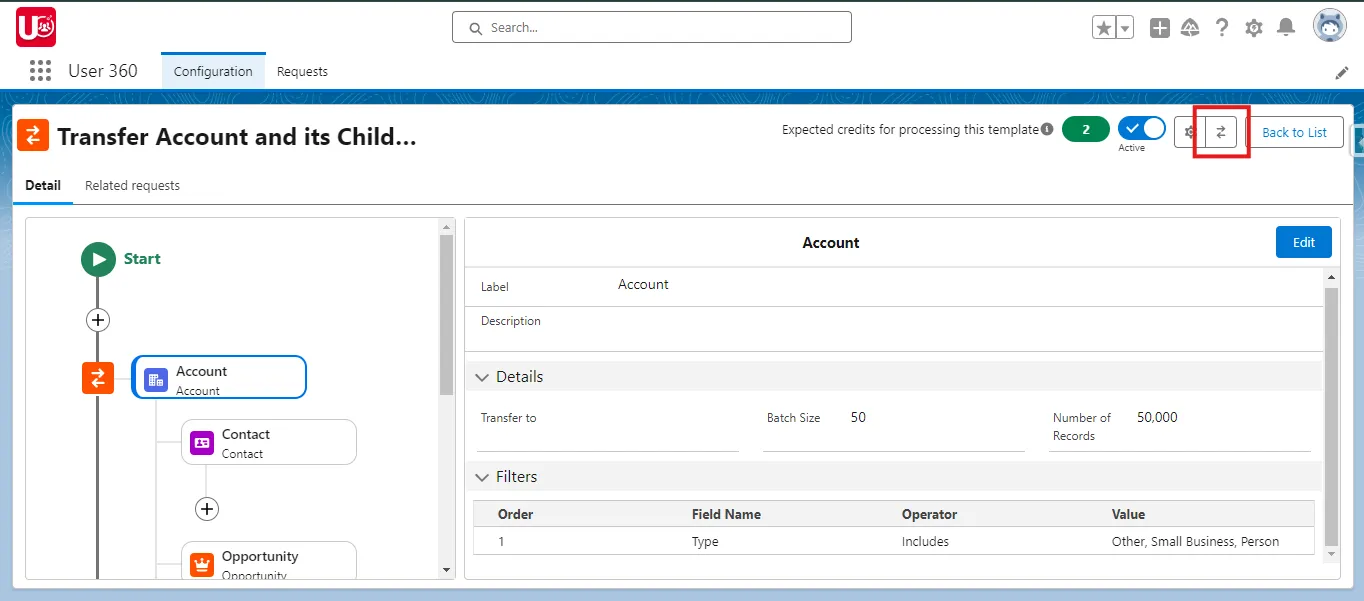
2. Initiate the Transfer Request
- Click the Transfer button in the top-left corner of the template.
- A new Transfer Request page will appear where you can specify which user’s records need to be moved
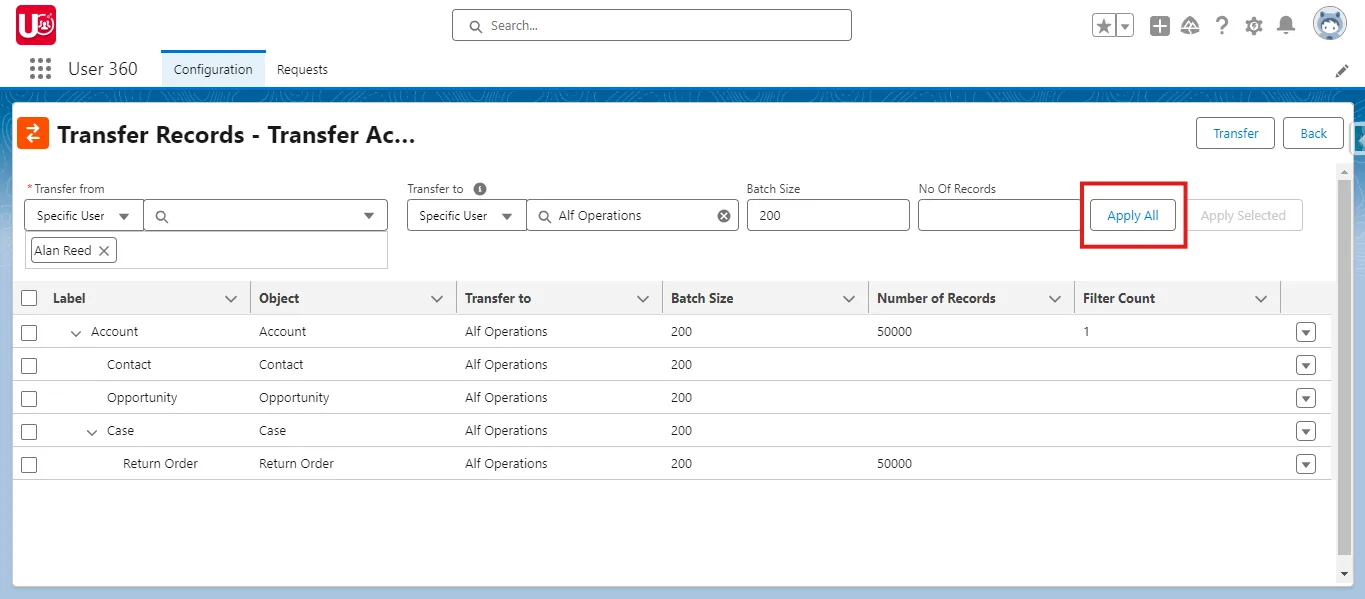
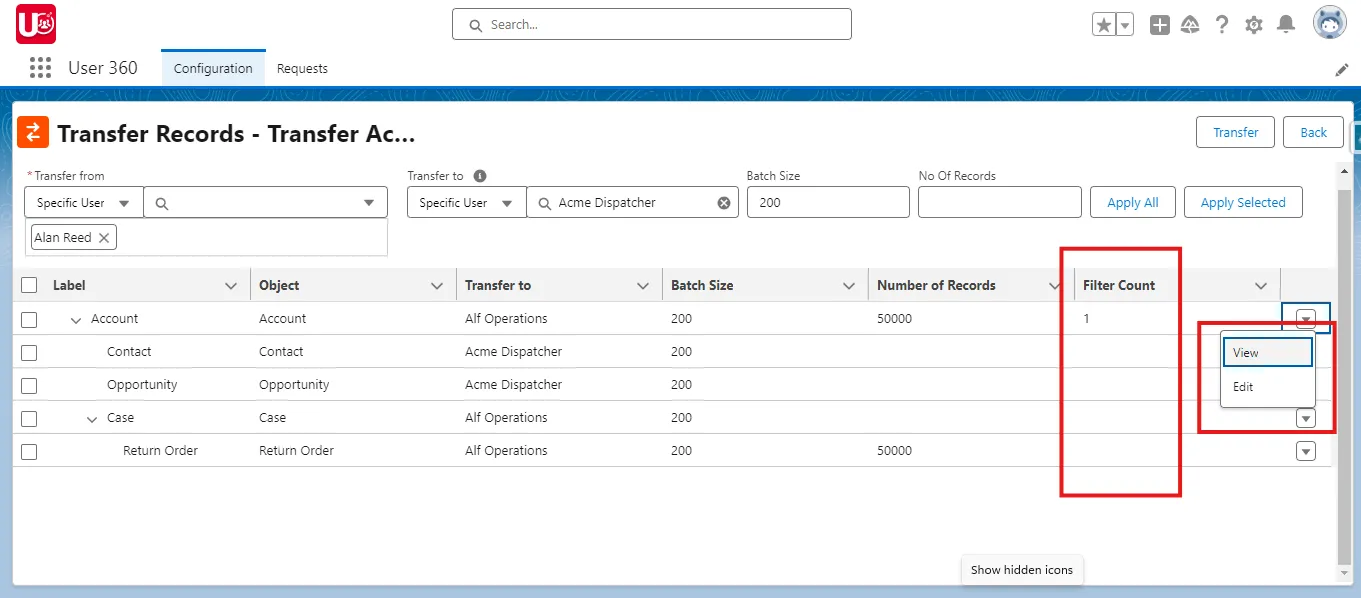
3. Define the Transfer Parameters
- In the Transfer From field, select the user whose records need to be transferred.
- In the Transfer To field, select the new user who will take ownership of these records. (Slide 2)
- Make sure to review and adjust the Batch Size. A recommended size of 200 records per batch ensures smoother processing without system slowdowns.
4. Customizing the Record Transfer
- Use the Apply All option to move all records related to the selected user.
- In the Transfer To field, select the new user who will take ownership of these records.
- Make sure to review and adjust the Batch Size. A recommended size of 200 records per batch ensures smoother processing without system slowdowns.
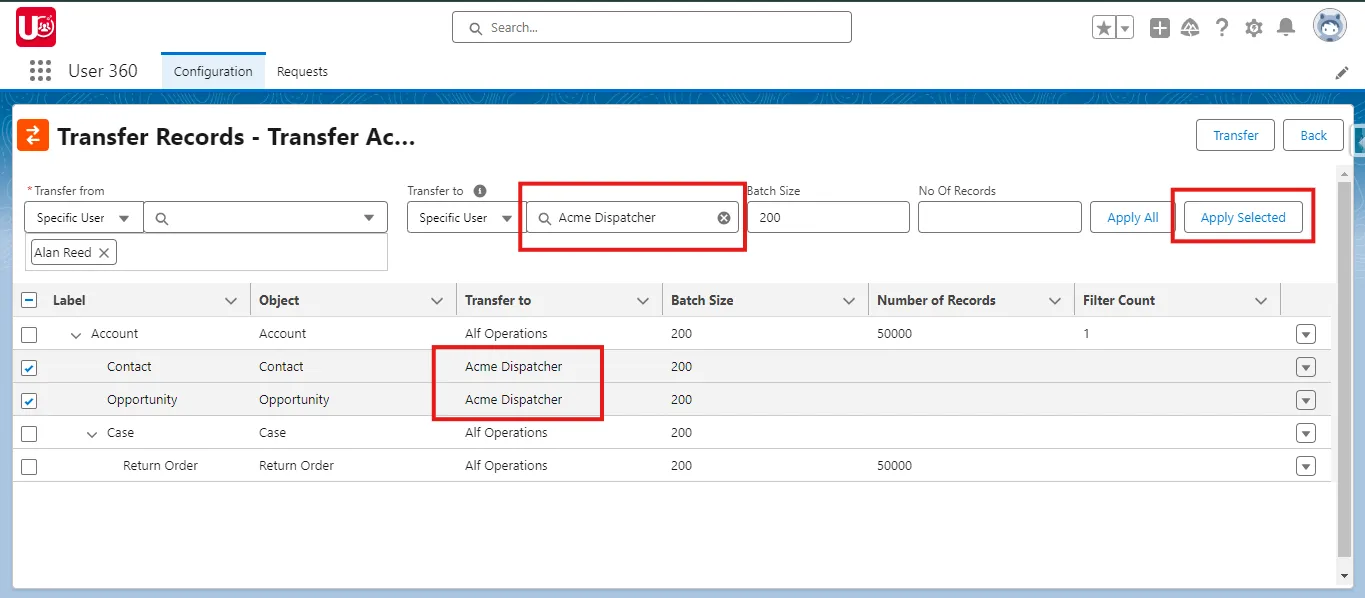
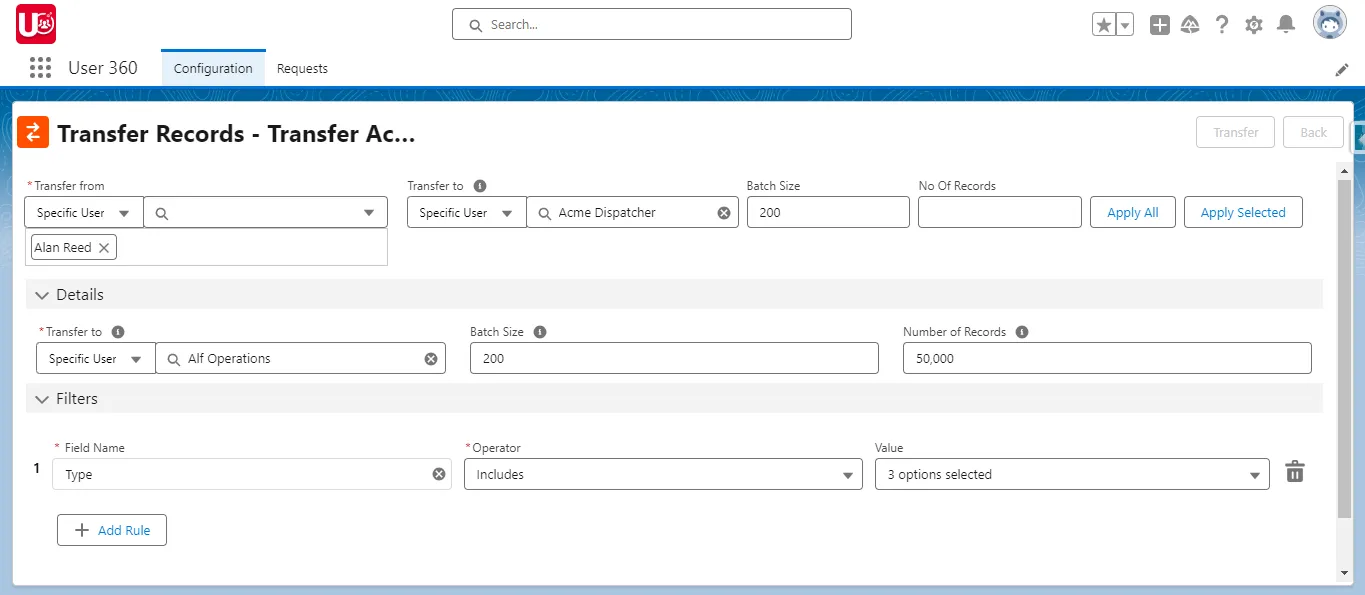
5. Advanced Options and Filters
Review the Filter Count next to each object to see if any filters have been applied. You can drill down into each object by clicking the Downward Arrow for a detailed view of the data being transferred.
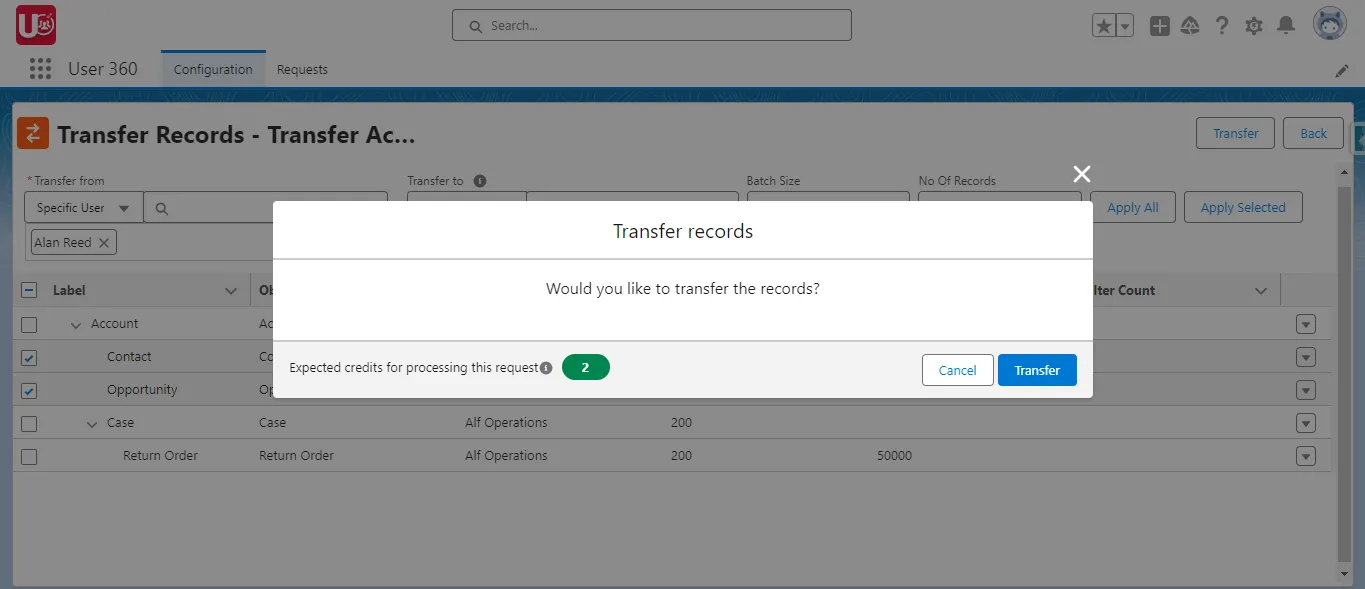
6. Confirm and Execute
Once you’ve reviewed the transfer details, click Transfer to initiate the process. The system will process the records immediately based on the template’s configuration.
Tracking and Reviewing the Transfer
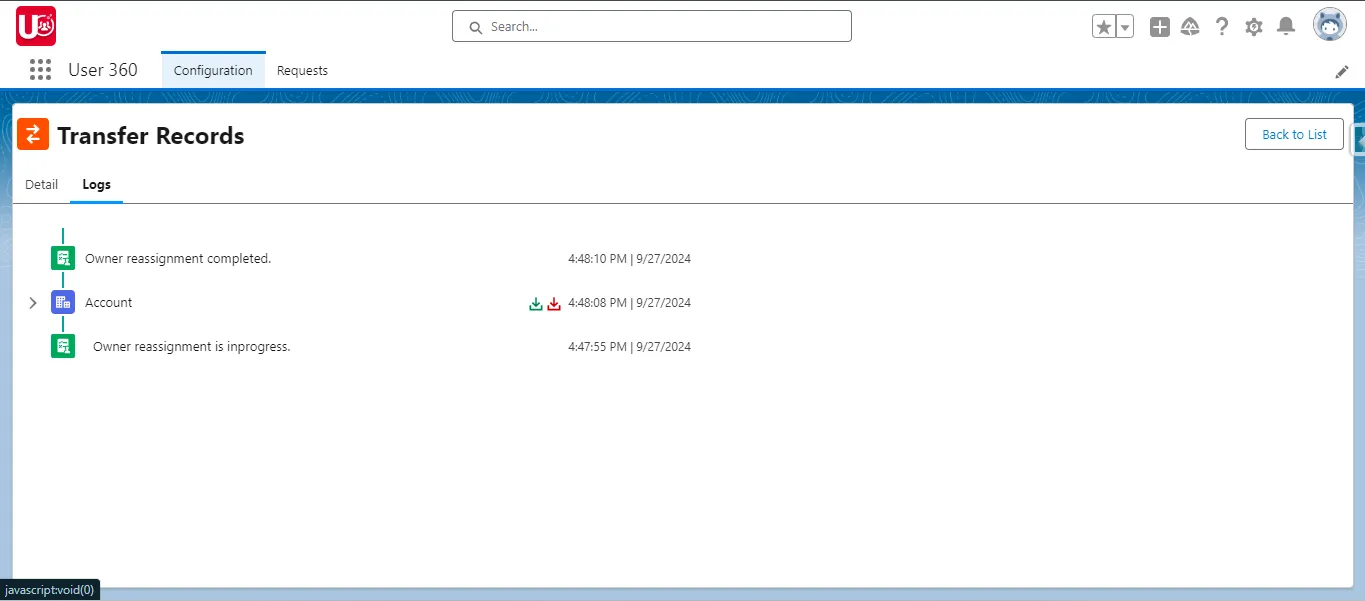
After executing the transfer, User 360 provides a clear overview of the process:
Logs
Once the transfer begins, you’ll be automatically redirected to a Logs tab that tracks the status of each record transfer.
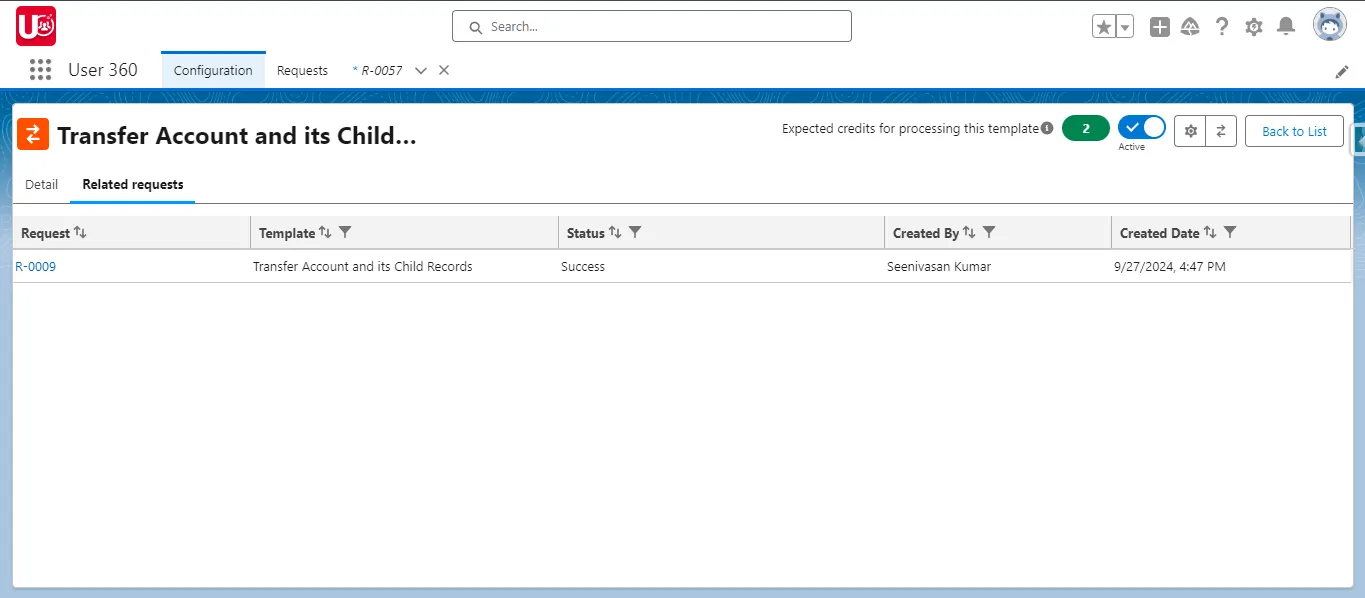
Related Requests
You can also view the entire transfer history in the Related Requests tab of the Transfer Template for easy access. You can find Ad-hoc transfer requests success or failure.
Conclusion:
Executing Transfer Records immediately with User 360 allows you to respond to data transfer needs with speed and precision. By leveraging the templates created in earlier stages, you can efficiently transfer record in salesforce at a large-scale without manual effort, ensuring accuracy.
Now that you’ve learned how to execute transfer templates, stay tuned for the next part of the series, where we’ll explore how to integrate these templates into process workflows for even greater flexibility and automation.
- Previous Blog in Series: Creating Transfer Records Templates
- Next Blog in Series: Using Transfer Templates in Process Templates
Ready to Transform with AI?
More Insights for you