Bulk User Offboarding Automation with User360
.svg)
Table of Contents
Offboarding users in bulk within Salesforce is a complex task that requires attention to detail and precision. In Part 1 of this series, we explored how to configure offboarding templates with User360. Now, in Part 2, we focus on implementing these templates to streamline the bulk offboarding process. This guide will walk you through the steps of deactivating multiple users at once, ensuring a smooth and efficient workflow.
Recap from Previous Blog
In prior blog, we discussed how to configure User360 to streamline offboarding, focusing on the importance of templates. These templates simplify the process and ensure an error-free approach to user deactivation. Now, let’s put those templates to work in bulk offboarding scenarios.
Streamlining the offboarding process for multiple users
Here’s a step-by-step guide on using Process Templates to deactivate multiple users with a Bulk Request:
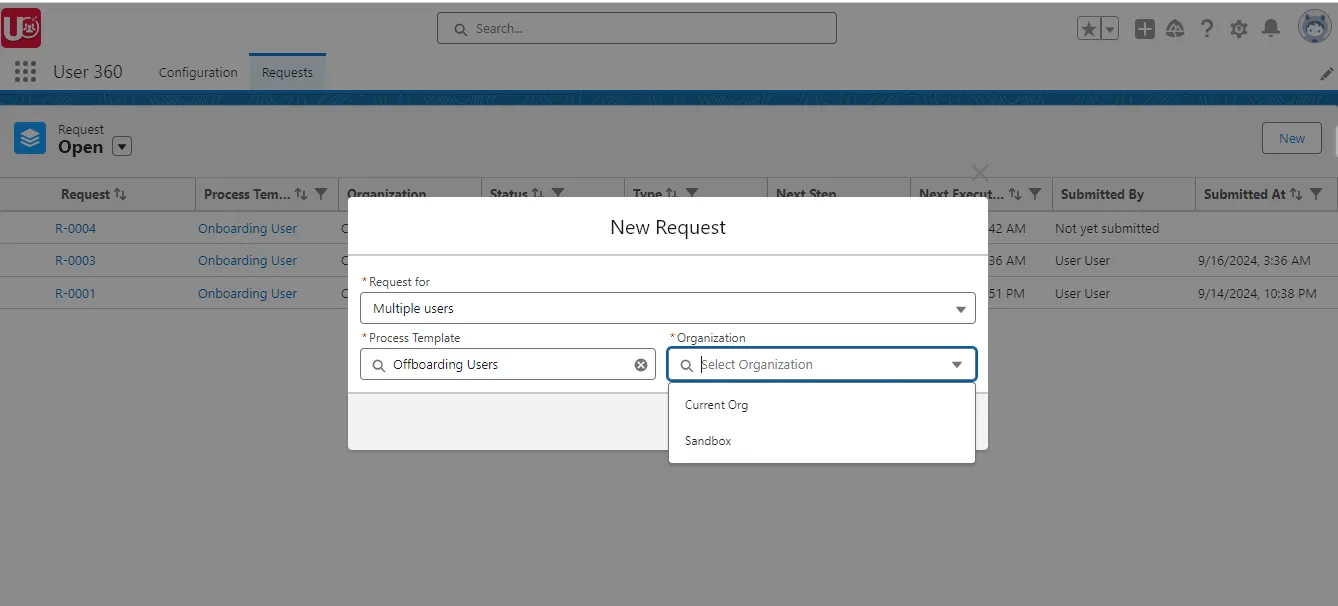
1. Navigating to the “Requests” Tab: Begin the offboarding journey by moving to the “Requests” tab within User360.
- Request Type: Select “Multiple Users” to deactivate multiple users at a time.
- Process Template: Choose “Offboarding Users” template that was created in the previous blog.
- Organization: Select “Current Org” and “Sandbox”. To create requests for both orgs, we need to create separate requests for each org. For more details on Multi-Org Setup, refer to the link.
- Save the Request: Click to save the request.
2. After Creating the Request:Once created, the request’s “Status” will be set to “Draft.”
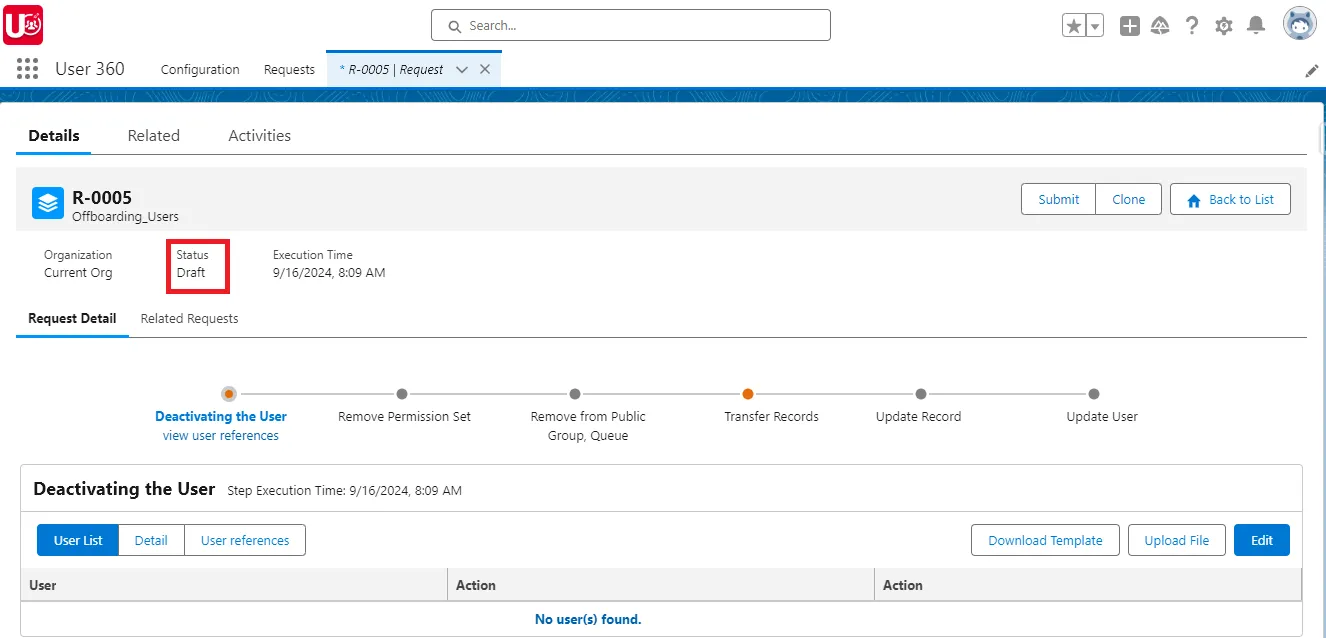
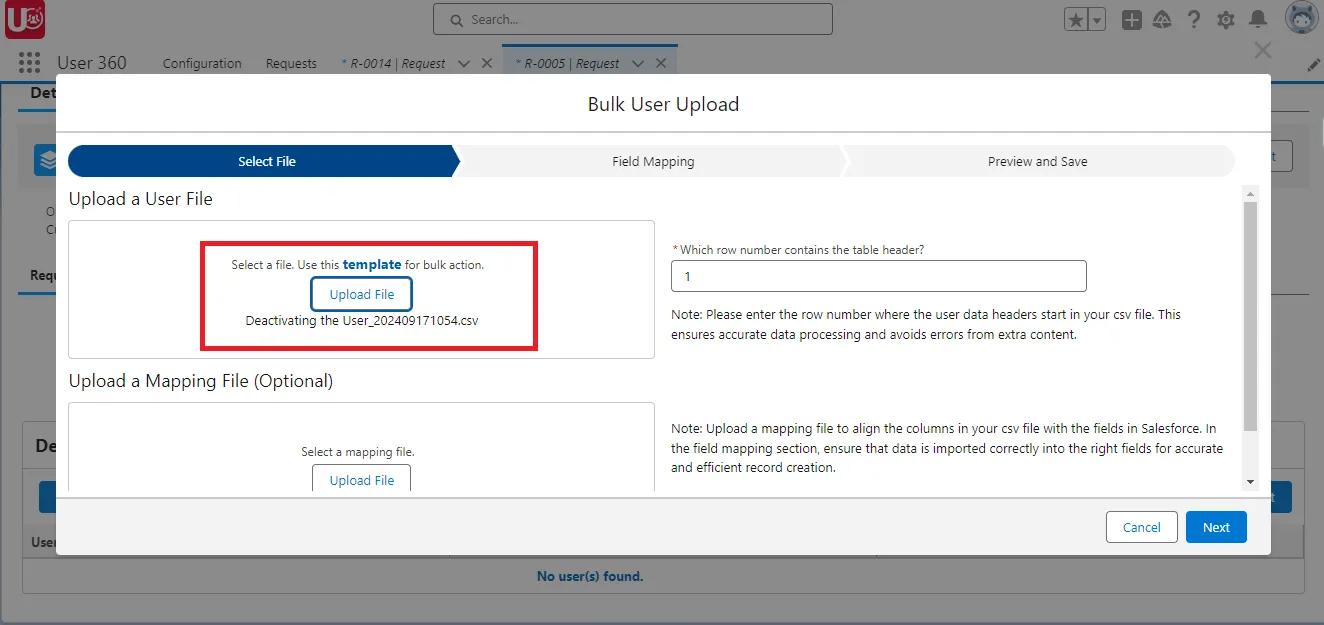
3. Updating User Details: In the initial step, ‘Deactivate or Freeze User,’ click the “Upload File” button and upload the “Deactivate User” CSV file with the correct mapping.

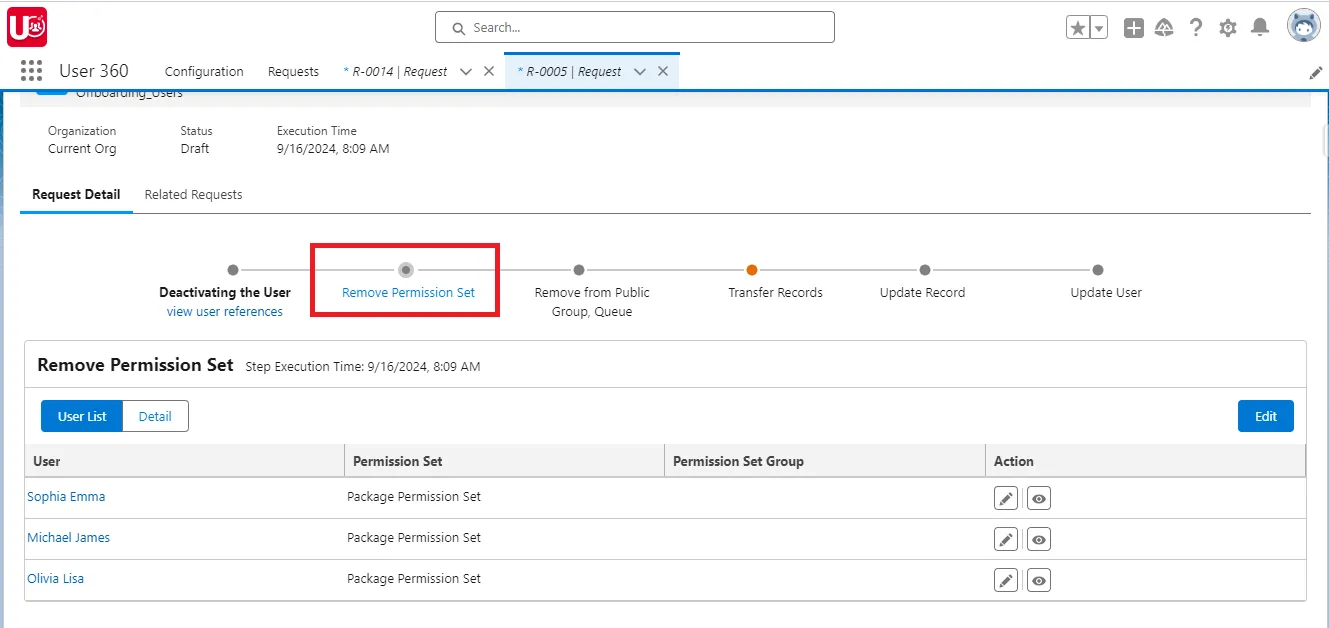
4. Remove from Permission Sets: Ensure the details in the “Remove Permission Set” section are accurate.
NOTE: If any editable fields were set during template creation, update or add details as needed and save the step.
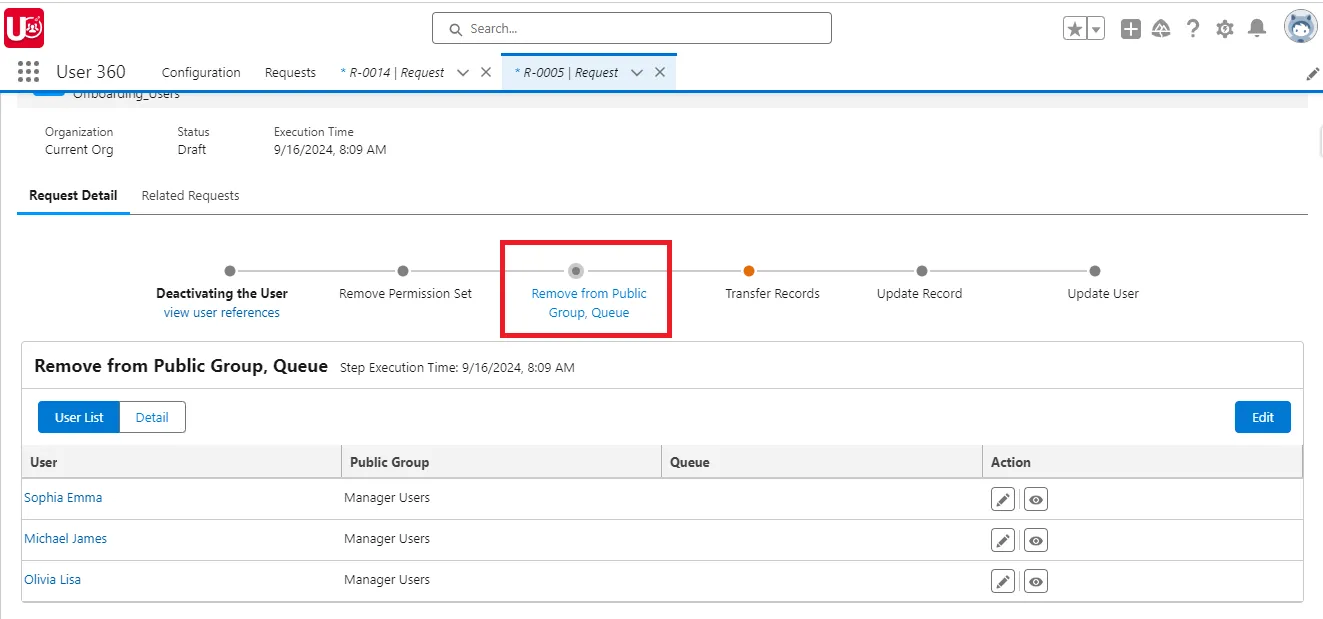
5. Remove from Public Group/Queue: Verify the details in the ‘Remove from Public Group/Queue’ section. If a user needs to be excluded, click the edit icon in the user’s row to remove them from the public group.
Progressing Through Subsequent Steps:
Follow the template as you move through each step of the offboarding process. Update and validate information systematically at every step.
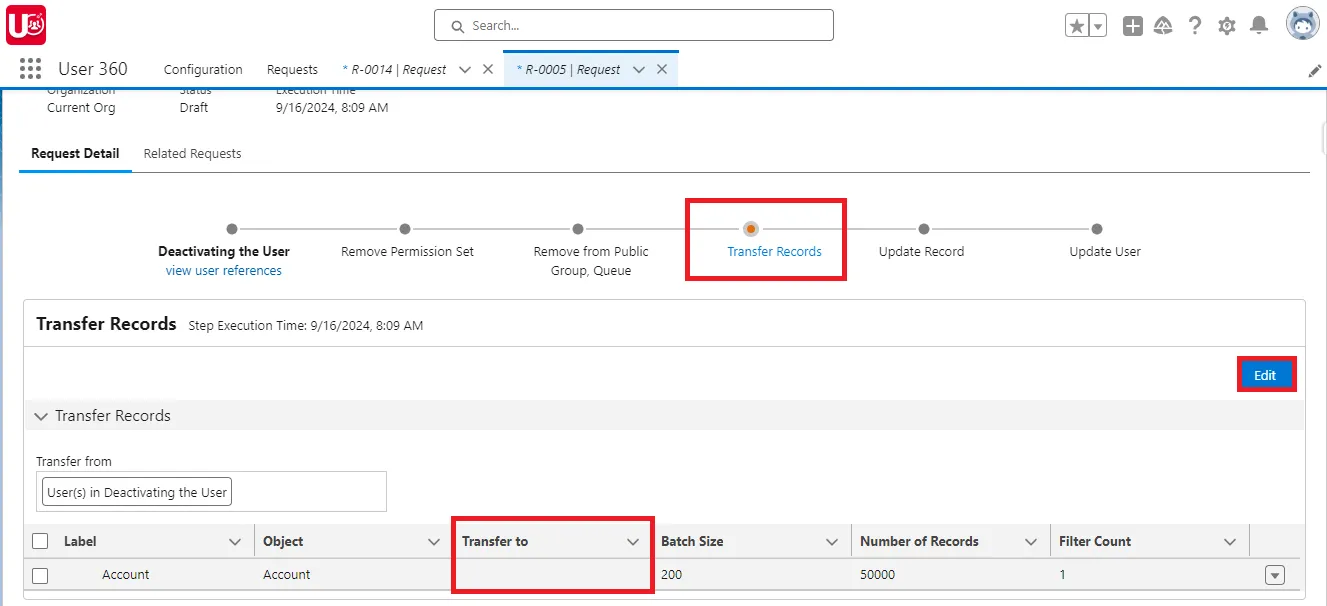
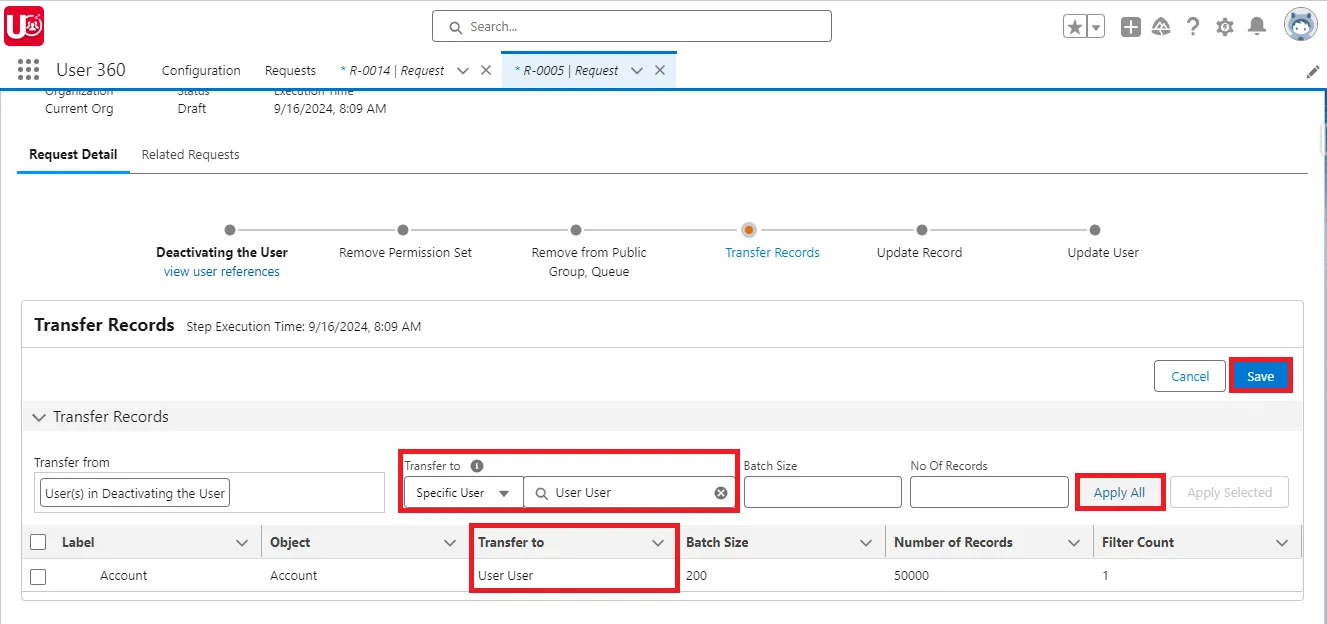
6. Transfer Records: Choose “Transfer To” user. Ensure all fields are correctly filled. Adjust the batch size or the number of records processed, if needed, as long as the field is editable in the template.
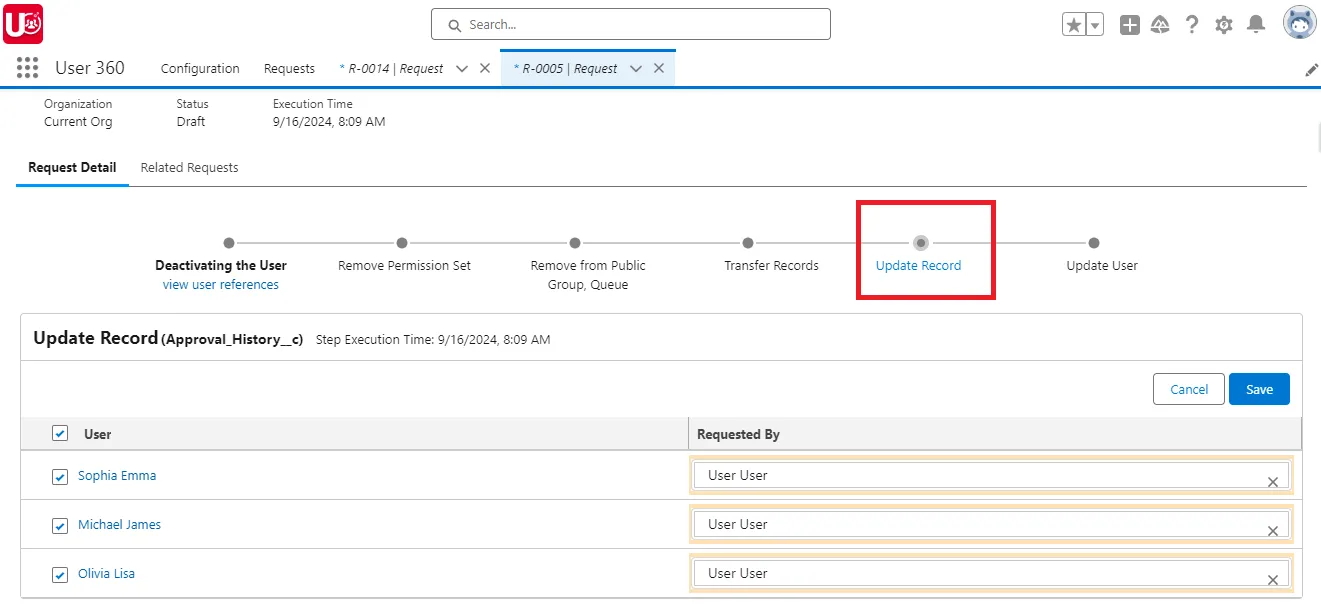
7. Update Record: For the ‘Update Record’ action, i select “John” as the user in the “Requested By” field.
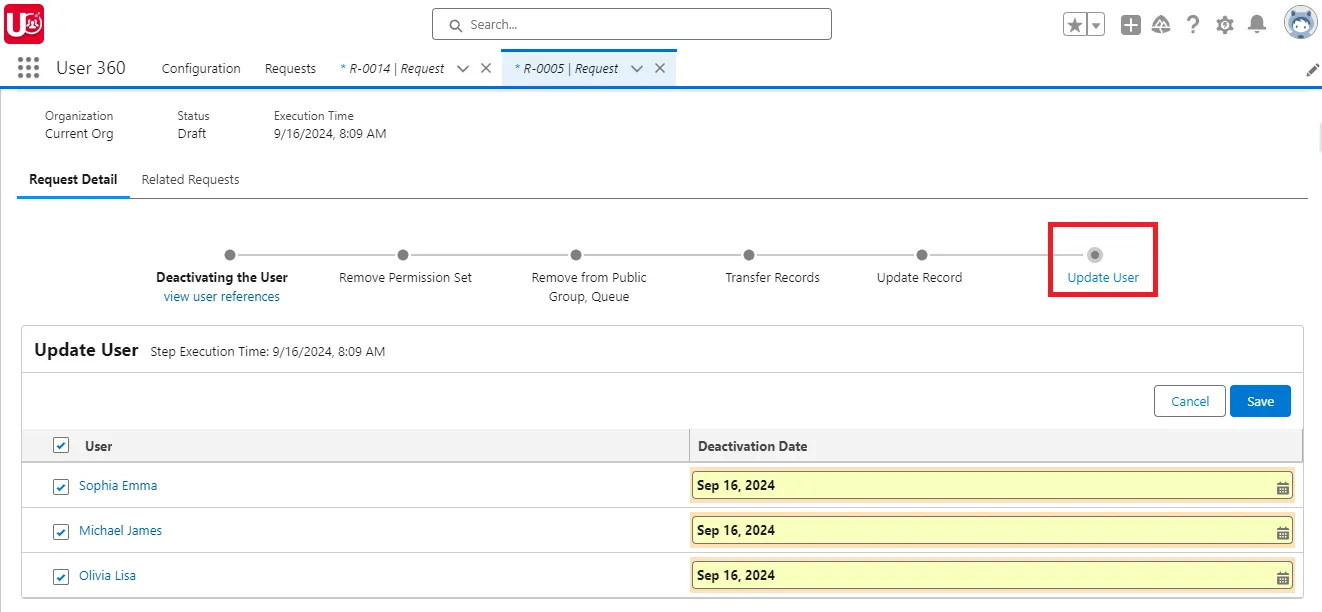
8. Update User: Select today’s date in the date picker for the “Deactivate Date” field.
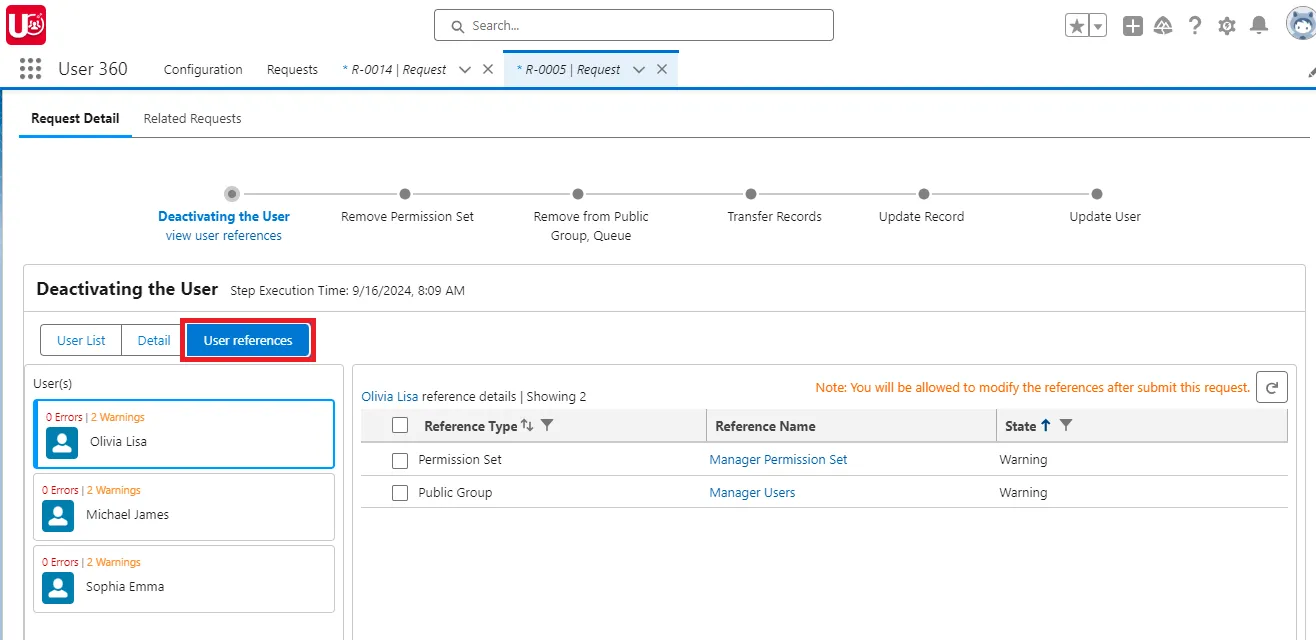
9. Check Before Deactivation: If the user is referenced in any Permission Sets or Public Groups or Dashboards, go to the “User References” tab in the primary action. Here, you can manually replace or remove any referenced users before proceeding.
NOTE: “Replace” action is only supported for Process Owners and Module Admins.
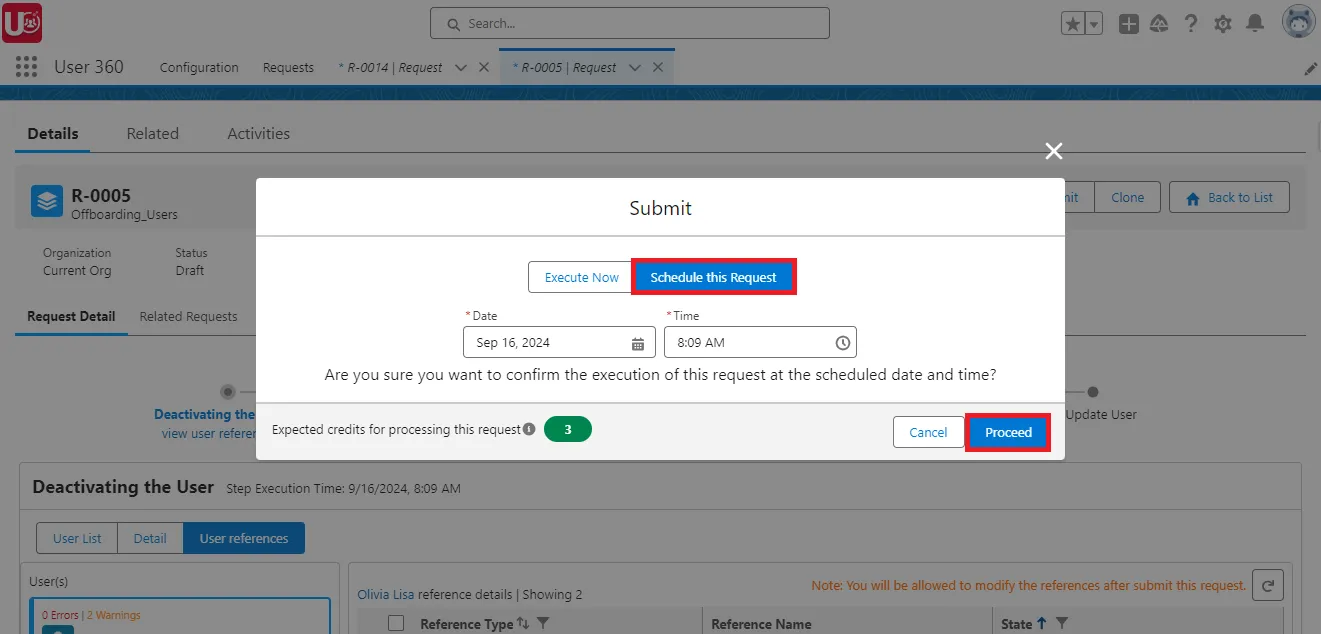
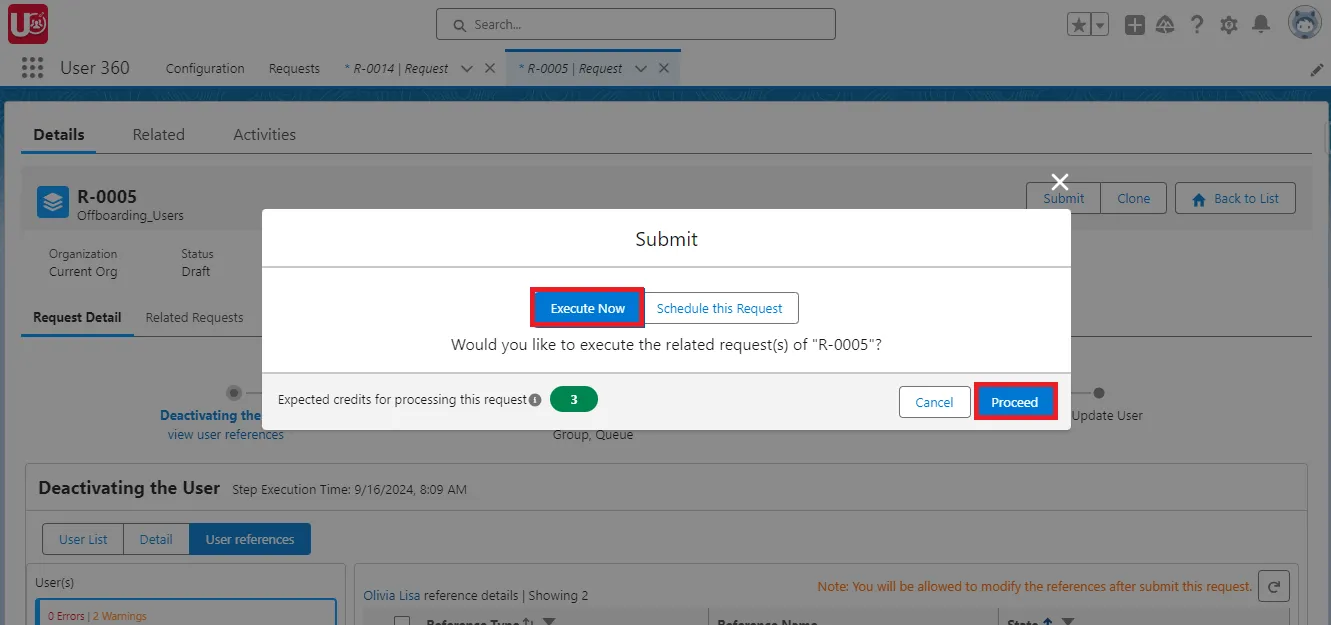
10. Execution: Click the “Submit” button and select “Schedule this Request” to set the date and time for execution. the offboarding process will follow the schedule.
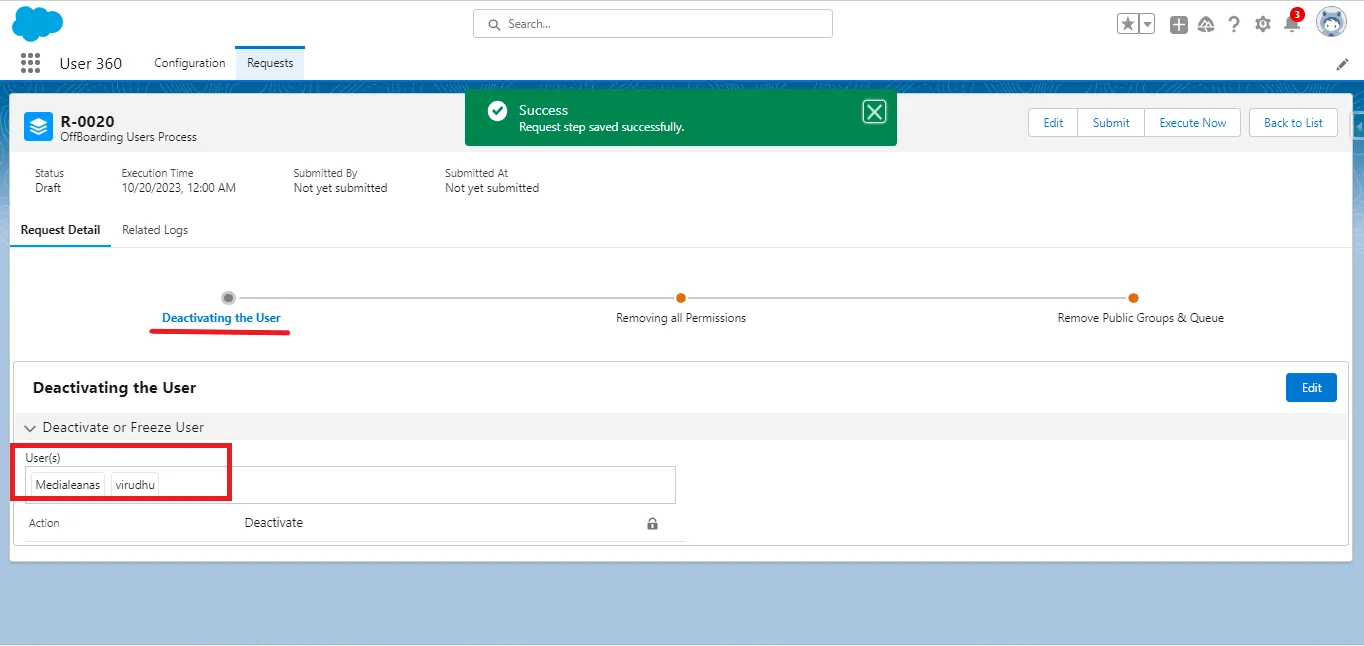
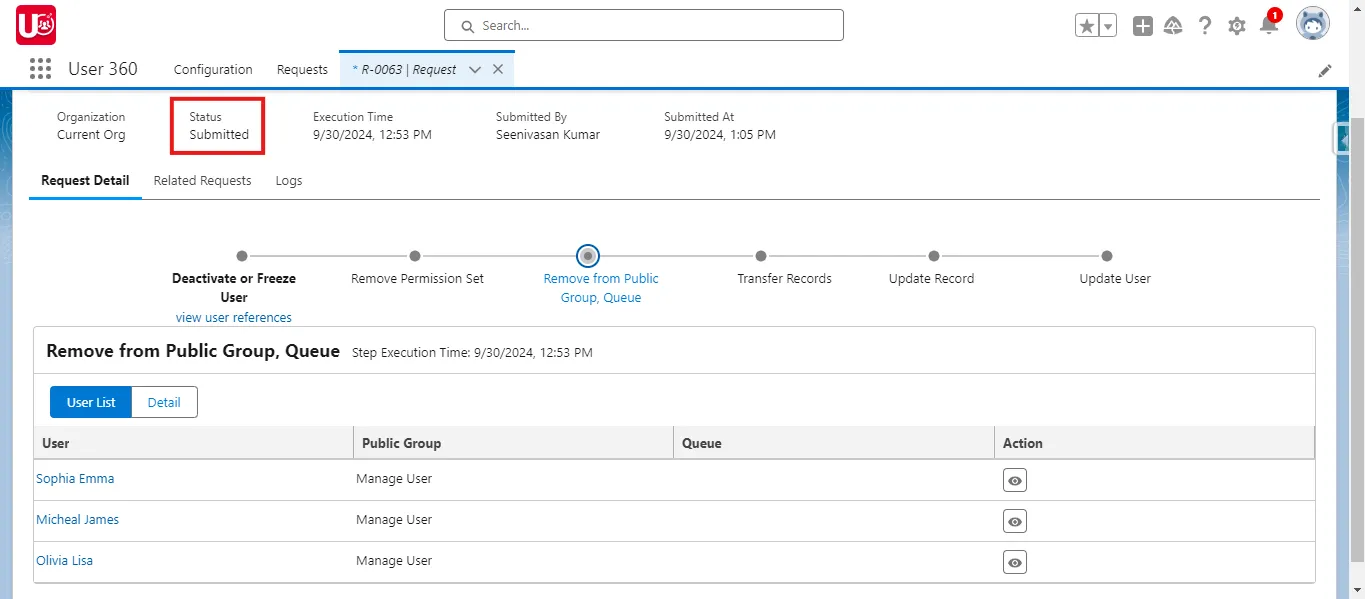
Status: After submitting, the request status will change to “Submitted.”
11. Immediate Execution (Optional): Alternatively, click “Execute” and select “Execute Now” to run the process immediately.
Status: After clicking the ‘Execute Now’ button, the status will change to “Submitted”.
12. After Submission: The status field reflects the execution status:
- Success: The request was executed successfully.
- Error: An error occurred with the request.
- Cancelled: The request was canceled before execution.
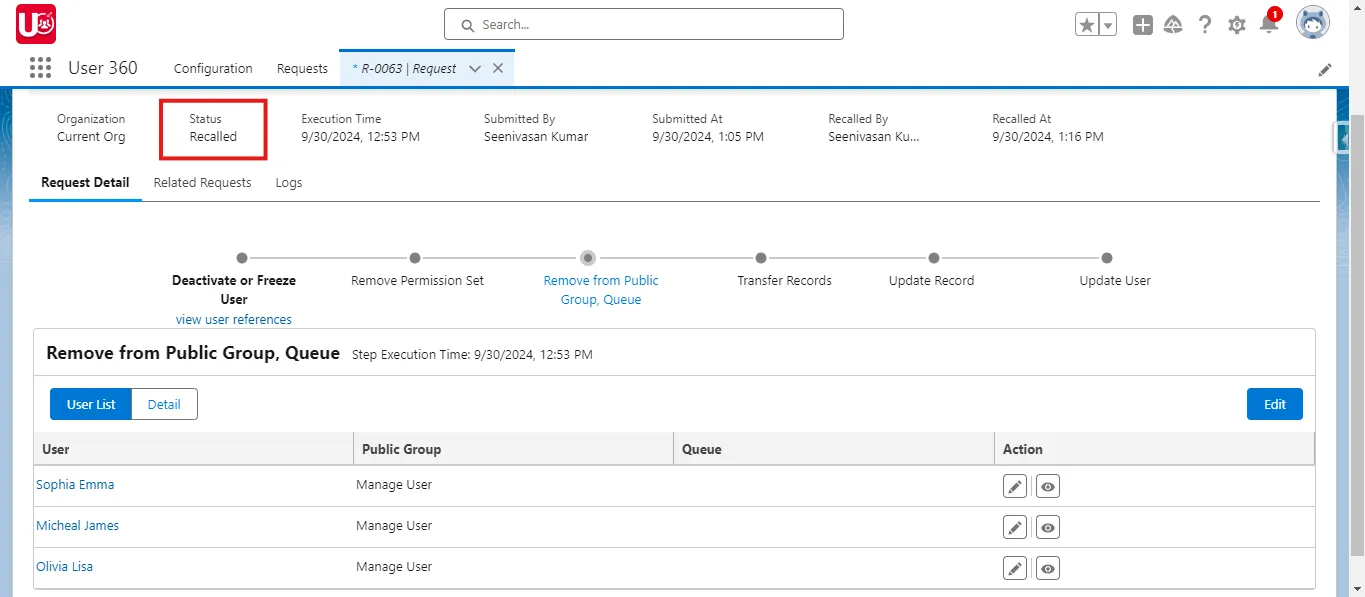
- Recalled: The request was recalled by the user.
- Resubmitted: A recalled request was resubmitted.
13. Error Handling with Related Logs: Use the “Related Logs” tab to troubleshoot errors. The logs provide detailed information to ensure the process is completed successfully.
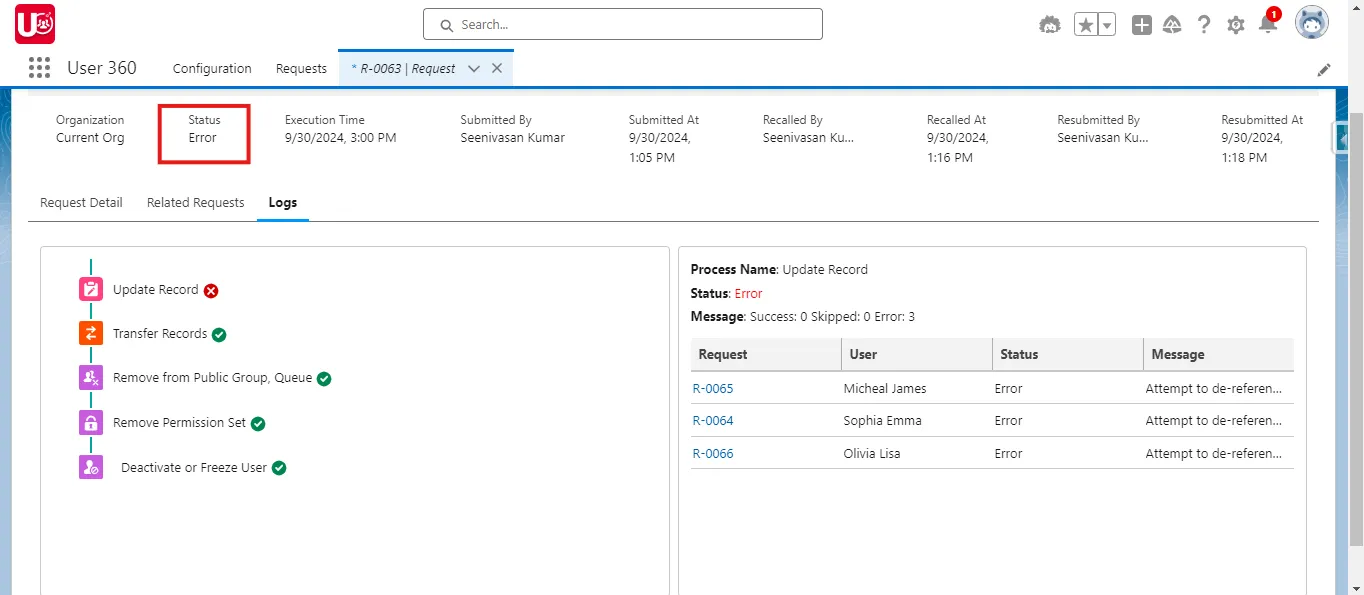
- Recall and Resubmit: If an error occurs, recall the request, make the necessary adjustments, and resubmit it for accurate user deactivation.
- Cancel Request (Before Execution): Cancel the request if needed before execution. Once canceled, the request can no longer be edited.
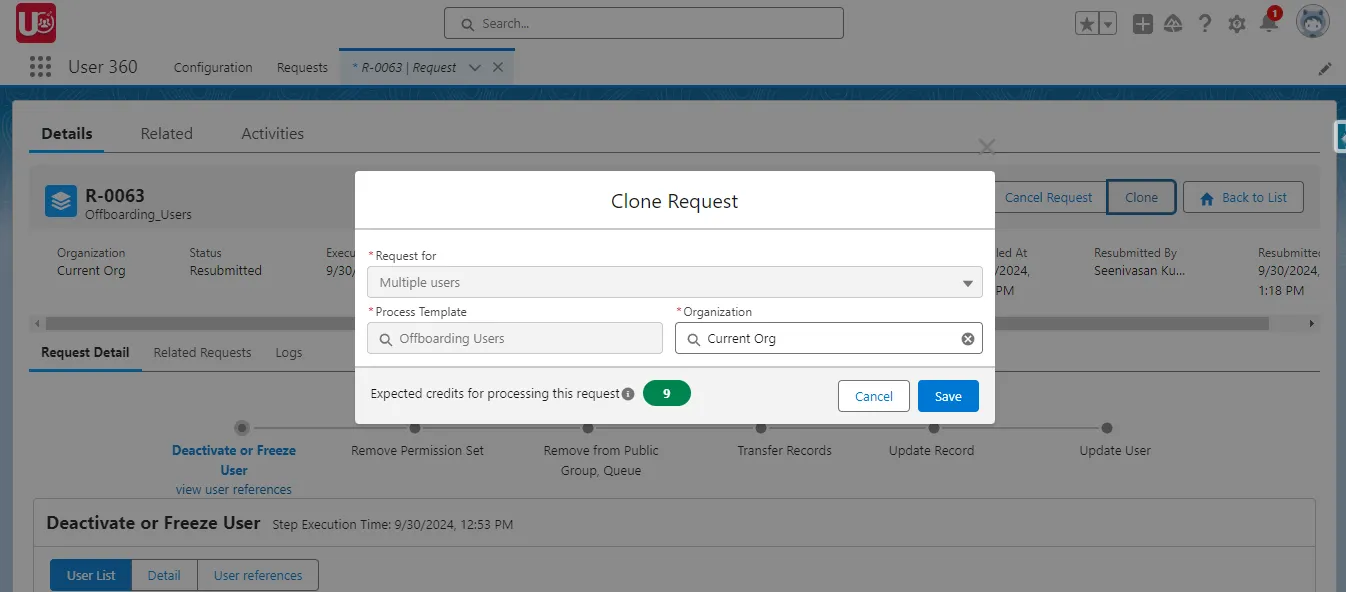
14. Clone This Request (If needed): To quickly create a new request with the same details, click “Clone This Request.” This will generate a duplicate with pre-filled information from the original request.
Conclusion:
By using User360 for bulk user offboarding, organizations can efficiently manage multiple deactivations with minimal manual effort. The templates streamline the process while ensuring data accuracy and security. If you haven’t seen Part 1, where we covered how to configure these offboarding templates, be sure to check it out here to get the full picture.
Ready to Transform with AI?
More Insights for you