Leveraging User360 Templates to Onboard Salesforce Users
.svg)
Table of Contents
Welcome back to the second part of our User360 journey, where we continue exploring efficient user management in Salesforce. In this blog, we build on the configuration steps from the previous post and dive into the practical application of User360 templates for streamlined user creation workflows.
Recap
In the previous blog, we set up configuration templates. Now, we elevate our understanding by using those templates to optimize user requests, making user management in Salesforce more efficient and automated.
Streamlining User Onboarding with a Single Request
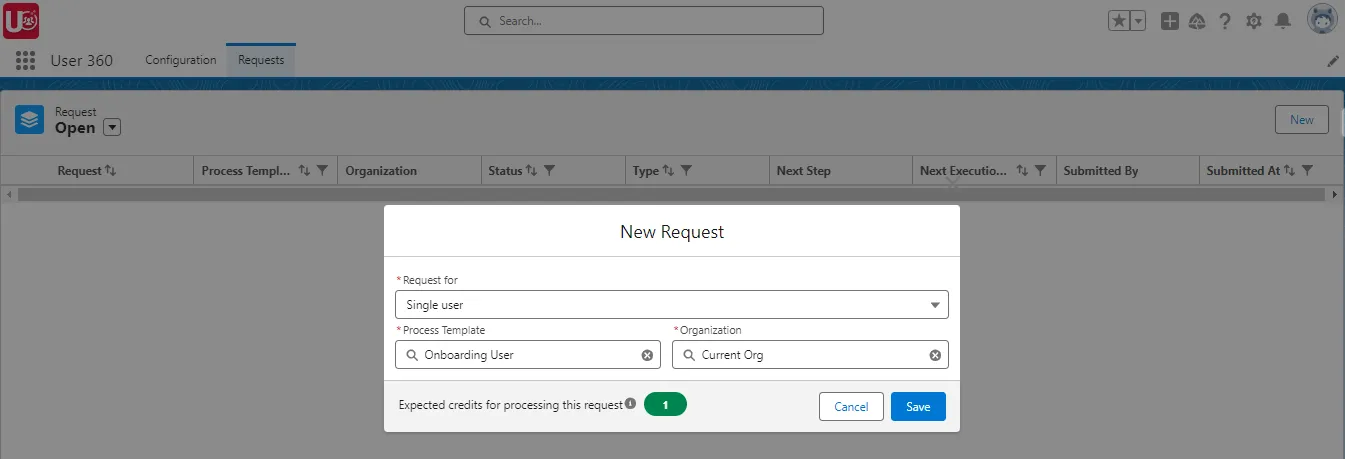
Here’s a step-by-step guide on using the Process templates to create a Single User Request
- Access the Requests Tab: Navigate to the “Requests” tab to initiate the user creation process.
- Request Type: Select “Single User” to create request for just a single user.
- Process Template: Choose “Onboarding User” template that was created in the last blog.
- Organization: Select “Current Org”. You can select more than Org if required. Check out more details about the Multi-Org Setup here.
- Save the Request: Click to save the request.
- Access the Requests Tab: Navigate to the “Requests” tab to initiate the user creation process.
- After Creating the Request: Once created, the request’s “Status” will be set to “Draft.”
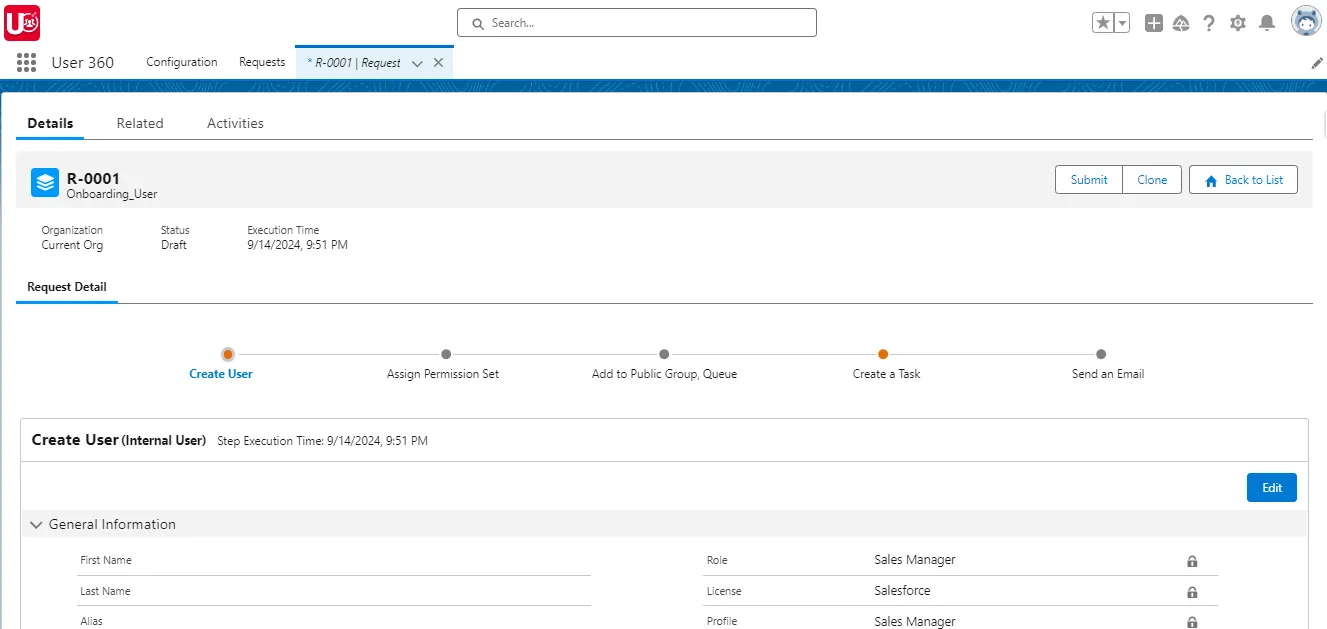
- Fill in User Details: Fill in User Details: Complete user details, including name, email, and any additional fields outlined in the template.

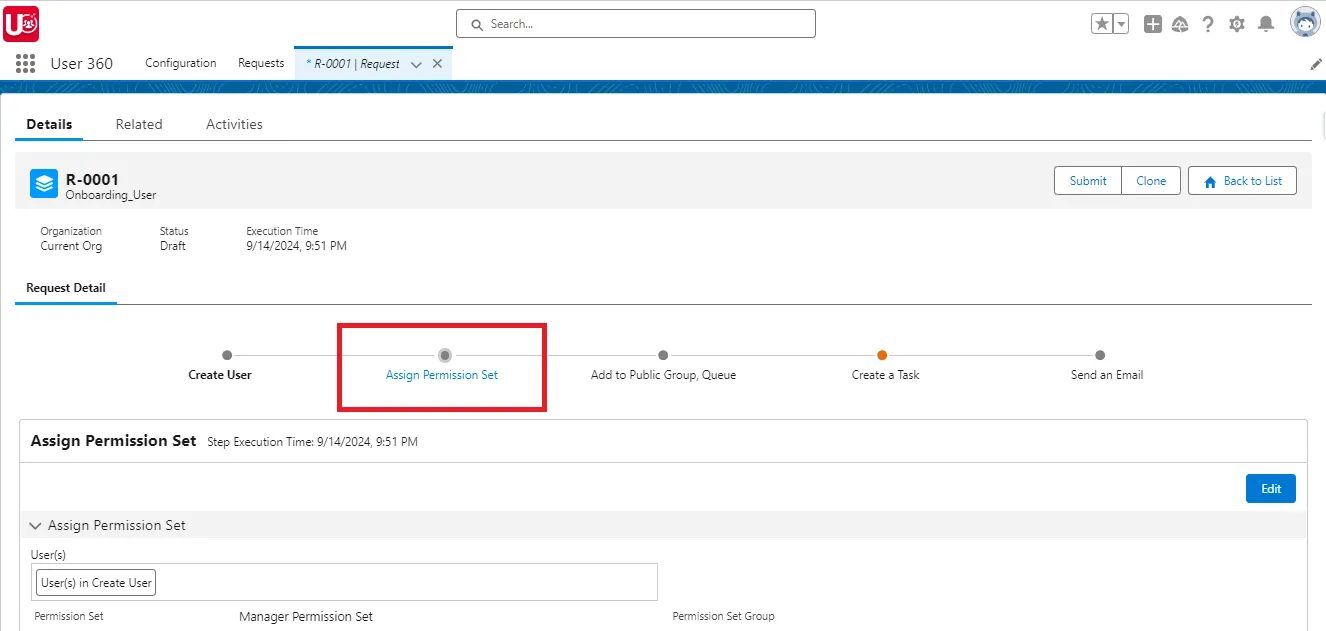
- Assign Permissions: In the “Assign Permissions” step, update or add necessary information, ensuring alignment with editable fields.
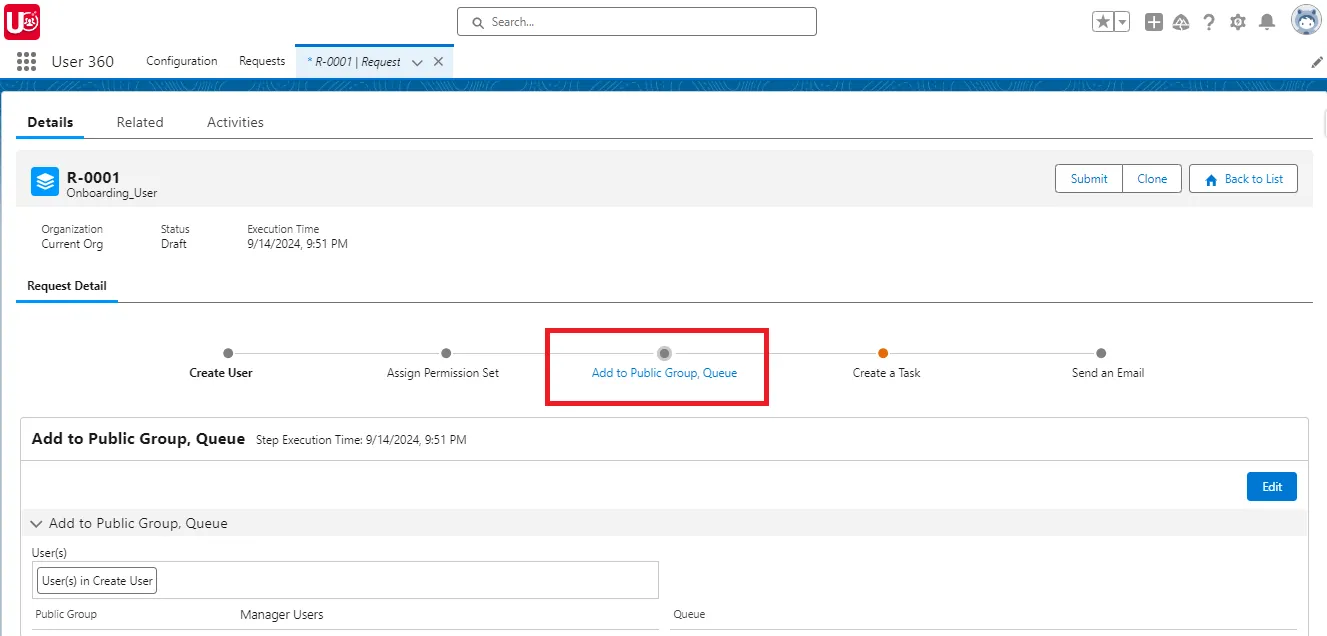
- Add to Public Group/Queue: Proceed to the “Add Public Group/Queue” step. Update or add details, ensuring alignment with editable fields.
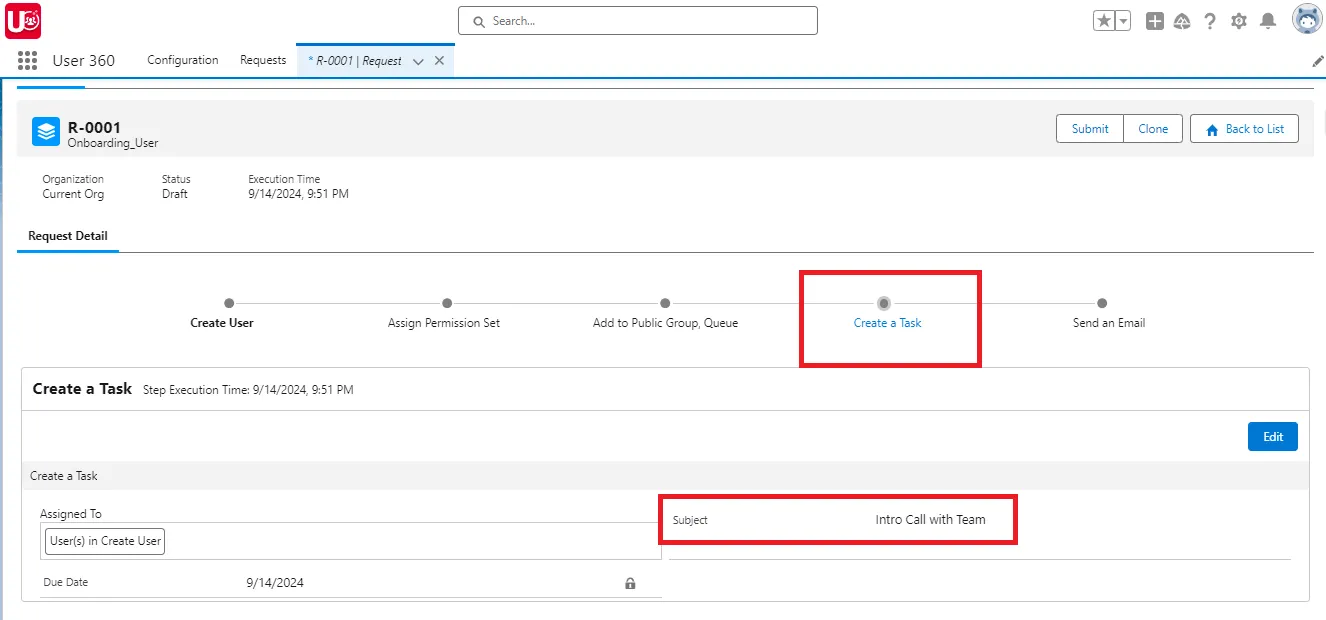
- Create Task: Move to the “Create a Task” step and enter values for the “Subject” fields
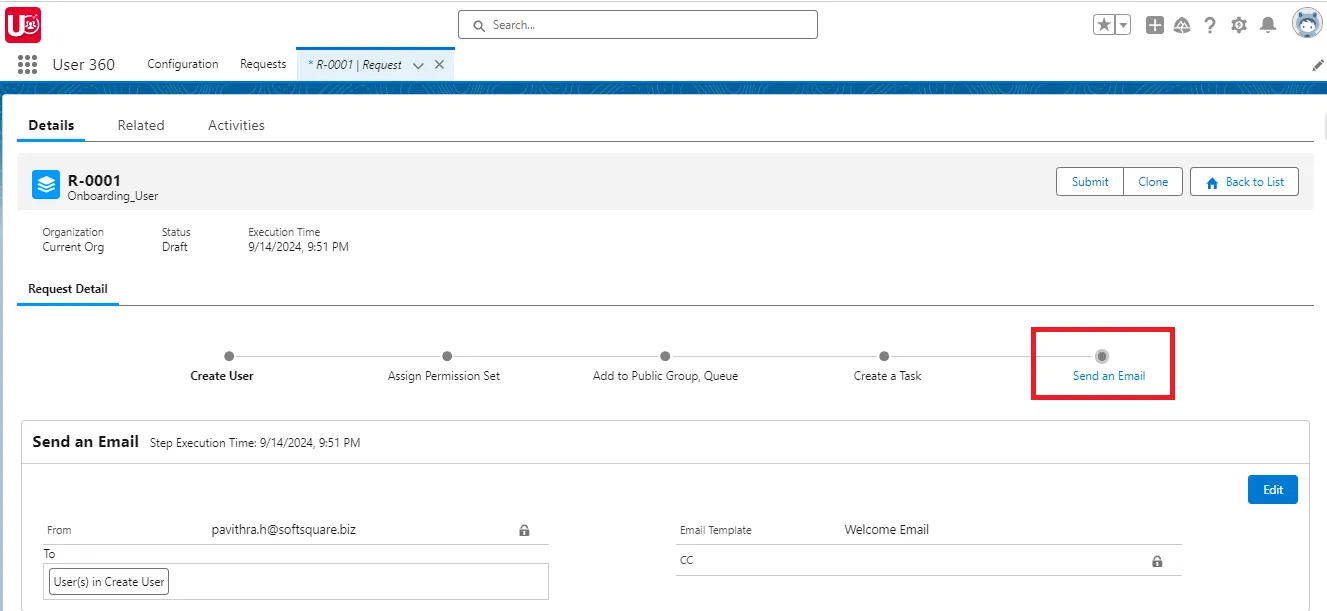
- Send Notification Email: Proceed to the “Send an Email” step and optionally include CC recipients if necessary.
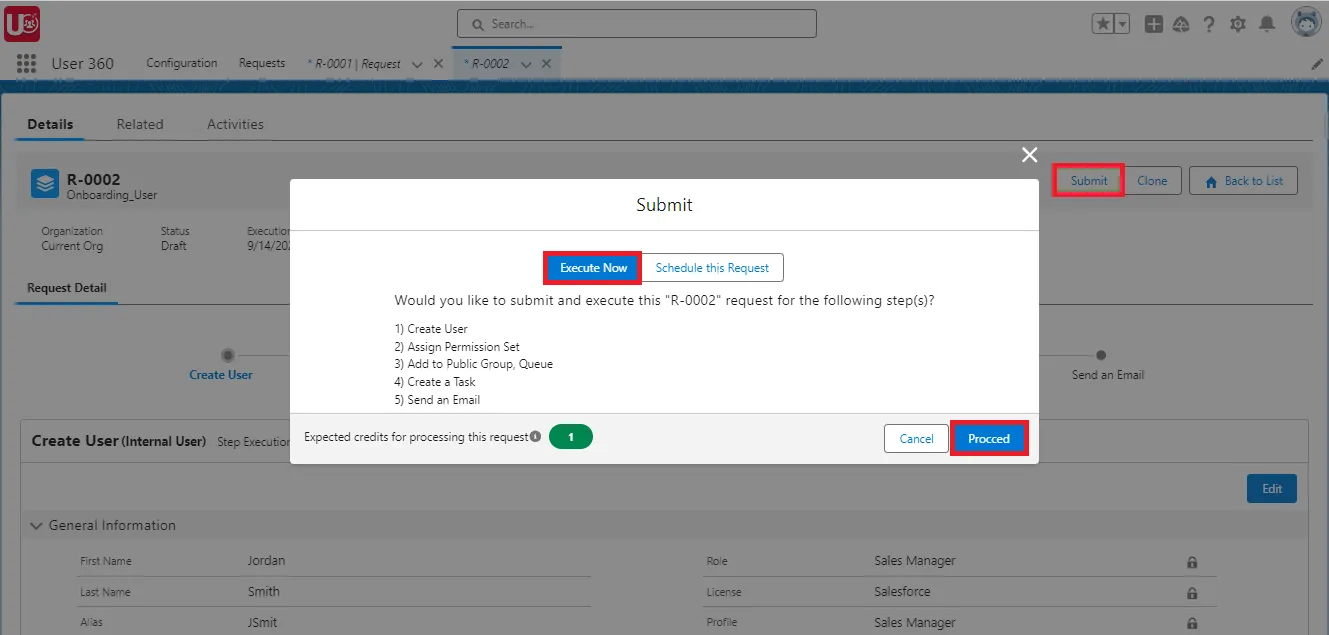
- Execution: Click the “Submit” button and select “Schedule this Request” to set the date and time for execution. Once submitted, the user will be created based on the scheduled time.
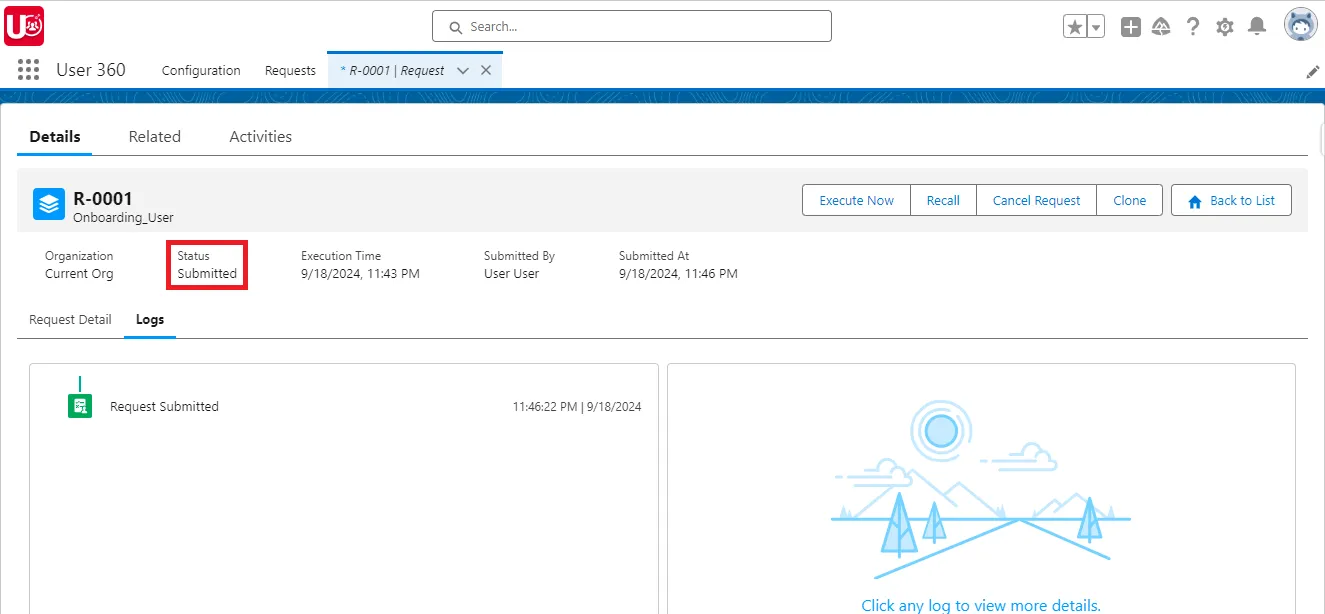
Status: Once the request is submitted, its status will change to “Submitted.”
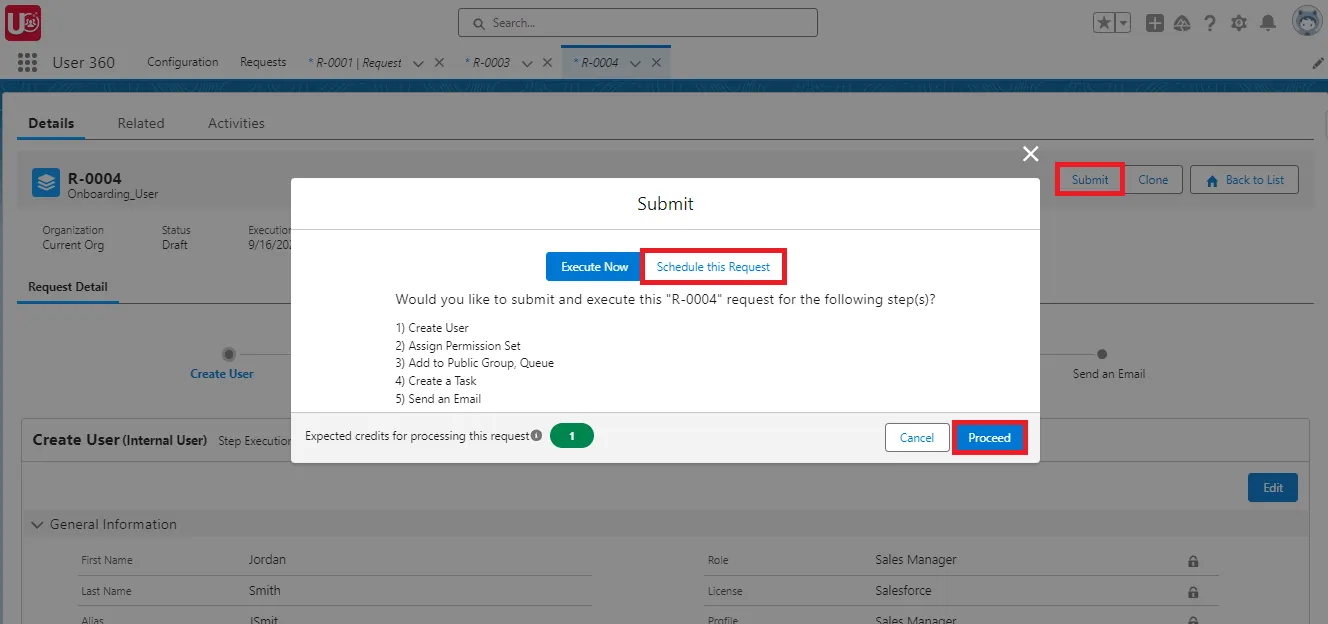
- Immediate Execution (Optional): If you wish to run the request immediately, click “Execute” and then select “Execute Now.”
Status: After clicking the ‘Execute Now’ button, the status will change to “Submitted”.
- After Submission: The status field reflects the execution status:
- Success: The request was executed successfully.
- Error: There was an error with the request.
- Cancelled: The request was canceled before execution.
- Recalled: The request was recalled by the user.
- Resubmitted: The recalled request was resubmitted.
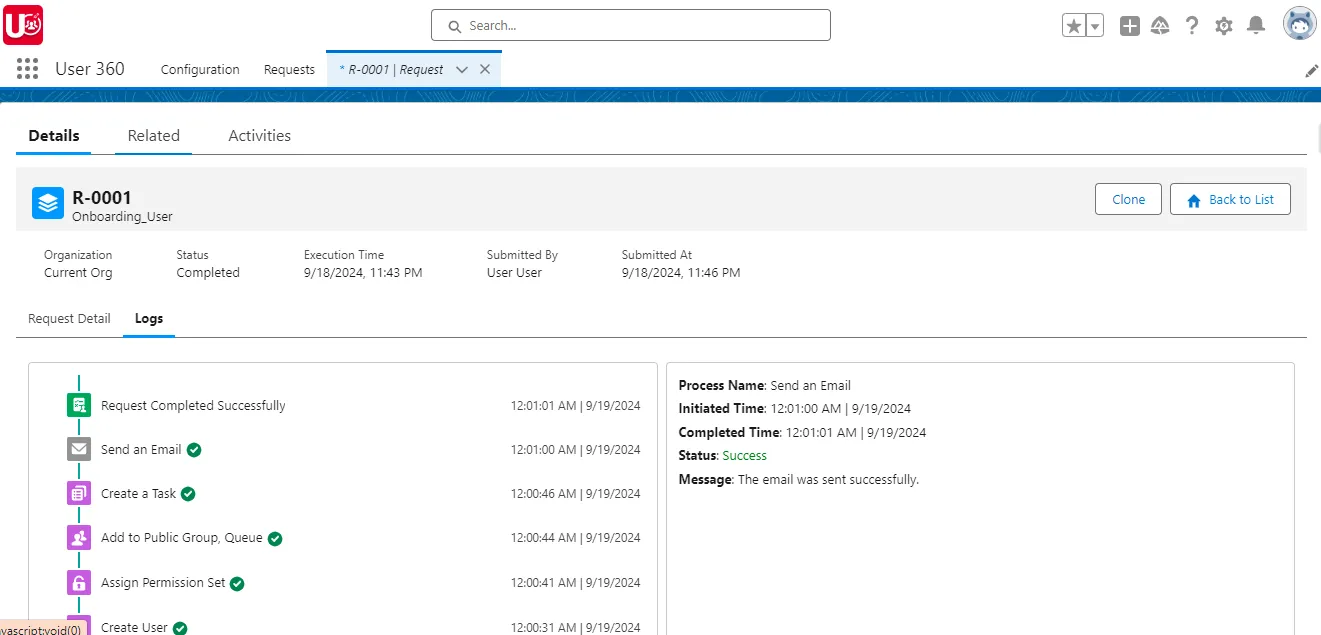
- Error Handling with Related Logs: Use the “Related Logs” tab to troubleshoot errors and access detailed information for successful completion of the process.
- Recall and Resubmit: In case of errors, recall the request, make changes, and resubmit, ensuring accuracy in user creation.
- Cancel Request (Before Execution): Before execution, cancel the request if needed. Once canceled, the request becomes uneditable.
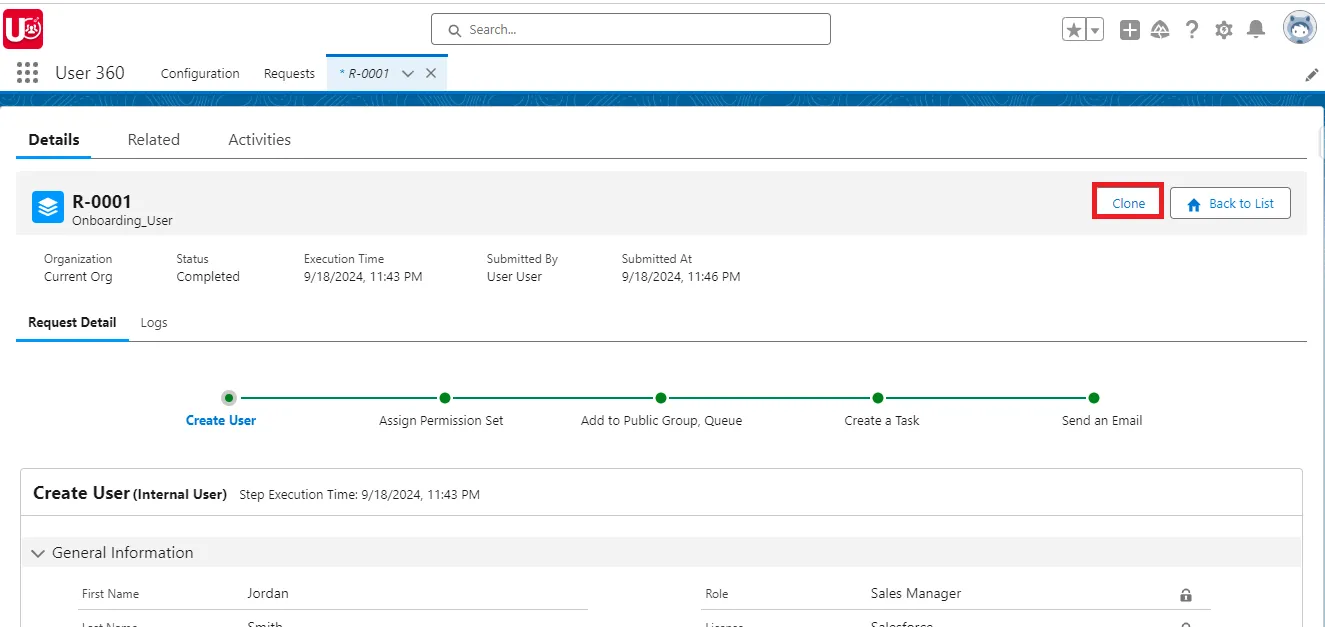
Clone This Request (If needed): To quickly create a new request with the same information, click “Clone This Request.” This will generate a duplicate, pre-filled with the original request details.
- Clone This Request (If needed): To quickly create a new request with the same information, click “Clone This Request.” This will generate a duplicate, pre-filled with the original request details.
And there you have it—your user management workflow simplified through User360 templates. These templates also allow for easy bulk user creation. For more information, refer to the link.
Conclusion
Now that you’ve mastered how to implement User Creation Templates with User360, you can streamline your Salesforce user management. If you missed the first part, revisit the previous blog for a detailed guide on configuring these templates.
Ready to Transform with AI?
More Insights for you